This guide will lead you through the process of creating a list view in iOS using Xcode and Swift, making HTTP GET calls to an API from within the application, using placeholder loading animations from a third party library while the API calls complete asynchronously, and finally loading the data received from the API into the list view. My main concern in writing this guide was to help users who have some basic experience with iOS development maintain a pleasant and fluid user experience when making a large number of API calls that may or may not take a good deal of time to complete. Instead of waiting for all of the calls to complete before loading any data (and thereby introducing a "chunky" loading experience), we will make use of a small third-party library to show the user a loading animation while as the calls complete, as well as load each piece of data as its call finishes.
For the purposes of this guide, I am using the example of a list of items that might be used in a roleplaying game (such as GURPS or D&D). If you feel confident using Xcode to develop iOS apps generally, you can use this guide to create a list of your own objects. On the other hand, if you don't have much experience with Xcode and iOS development, I suggest you walk through this guide as it is written. The guide assumes that you have Xcode updated at least to the point where it will support iOS 9.0, and that you have some very basic familiarity with using Xcode and Swift.
To get started, open Xcode and click on "Create a new Xcode project." You'll need to choose a template. For this guide, I chose "Single View Application." (Make sure you select "Application" from below "iOS" in the side menu before selecting a template.)
Click next to choose options for the project. Enter a Product Name (I chose "LoadingListfromAPIData"), select "Swift" for Language, and select "iPhone" for Devices. The other fields will be auto-filled and don't need to be changed for this project.
Click next to choose the directory to store the project in, and finally click create. This will open your new project to the general settings tab. In the Deployment Info section, select your Deployment Target, which is the lowest iOS version that your app will be able to run on. I set mine to 9.0 for this guide.
Next, we need to install the third-party library of loading animations, so go ahead and close Xcode for now. There are a few different ways to install the NVActivityIndicatorView collection. To read their documentation, go here. You can use any of the installation methods, although I used Cocoapods. Once you've completed this installation, open your Xcode project back up (if you installed the collection using Cocoapods, be sure to open your project using the .xcworkspace file from now on).
Back in Xcode, select Main.storyboard from the Project navigator.
We are going to lay out two scenes for this project: one main page and one list (or table) page. The main page is going to be pretty simple, just a landing page with a button to move to the list page. We'll get this set up first.
In the bottom, right-hand corner of Xcode, select the Object library and search for "button". Click on the Button object and drag it onto the center of the empty view controller.
Double-click on the button to change the text. I changed mine to "View All Items", since this button will lead to the page that lists all of the items. Next, in the Document Outline, select your newly created button, then click on Align (there's an icon on the bottom-right of the window, just to the left of the Object library). In the pop-up window, check the boxes for Horizontally in Container (with a value of 0) and Vertically in Container (with a value of -200). Set Update Frames to "Items of New Constraints" and then click "add 2 constraints". This will center the button horizontally in the view and place it 200 points above the center.
Now we need to make a connection between the button we've added to the scene and the code that controls the scene. To do this, switch to the Assistant editor (there's an icon in the top-right of the window), which allows us to see the storyboard next to the written code, in this case ViewController.swift. Control-click and drag from the button in the storyboard view to just below the class declaration for ViewController. A pop-up window will appear near where you ended the drag.
In the pop-up window, select "Outlet" for the Connection field, and enter a suitable name in the Name field. (I named mine "viewAllItemsButton".) You can leave the other fields as-is and click Connect. This will insert an outlet for that button into your code so you can reference it in the view controller.
Now, switch back to the Standard editor (there's an icon just to the left of the icon for the Assistant editor). We're going to add a second view controller to our storyboard, which will control our second scene.
Go to the object library, search for "table", and click and drag a Table View Controller object onto your storyboard (to the right of the existing view controller). You can zoom out to see the view controllers side by side.
In the Document outline, select "Table View" (under "Table View Controller"). Then, in the Size inspector (there's an icon below the icons for the Assistant editor and Standard editor), set the Row Height to 120.
Next, in the Document outline, select "Table View Cell" (which is under "Table View"). In the Attributes inspector (there's an icon to the left of the icon for the Size inspector), set the Style field to "Custom", the Selection field to "None", and enter a name for the cell into the Identifier field (I called mine "itemCell"). Then, in the Size inspector, set the Row Height field to 120.
Now that we've done some basic set up for the table and cell, we can add some objects to the cell to create our cell prototype. In the Object library, search for "label" and drag three labels onto the cell.
Select the top label and, in the Attributes inspector, change the font size to 25.
Then go to the Size inspector and change the Height field to 30. Drag and resize the length of the labels so they look nice in the cell.
Now that we've set the basic layout of our two scenes, we need to add a few custom classes to the project.
The first custom class that we need to create is a class for the cells in the table. To do this, go to File -> New -> File. In the window that pops up, select Source (under iOS) from the side menu and then select "Cocoa Touch Class" as the template for the new file. Click next to move to the next window.
Name your class something suitable (I went with "ItemTableViewCell") in the Class field. Select "UITableViewCell" for the Subclass of field, and "Swift" for the Language field. Click next to select the directory to place the new file in. It should default to the appropriate location, which is in the same folder as the other .swift files for your project. Click create to create the file.
Repeat the process to create a class to control the table view. It should also use the "Cocoa Touch Class" template. It will be a Subclass of "UITableViewController" and be named something like "ITemTableViewController".
Now that we've created the files for two custom classes, we need to connect the table view and prototype cell to these classes. In the Document Outline, select "Table View Controller" and, in the Identity inspector (there's an icon to the left of the Attributes inspector), select the class you created in the Class field (my class is "ItemTableViewController").
Go back to the Document outline and select the cell (mine is called "itemCell") and, in the Identity inspector, select the class you created for the cell (mine is "ItemTableViewCell").
Next, select "Content View" (under "itemCell" or whatever you named your cell) in the Document Outline and switch to the Assistant editor so that you can see your table view next to ItemTableViewCell.swift (or whatever you named your custom cell class).
Below the class declaration, type // MARK: Properties
, which is a comment that designates where to find the properties for the class. Control-click and drag from the top label in your cell to just below the comment. In the pop-up window, select "Outlet", type in a name for that label (mine is "nameLabel" because this is where I'll display the name of the item), and click connect.
Repeat this process to create outlets for each of the labels. (I named my second label "weightLabel", which will display item weight, and my third label "valueLabel", which will display item value.)
Now we need to create one more custom class. This class will define the data model for the project (in my case, it will define an "Item"). Go to File -> New -> File and, instead of selecting "Cocoa Touch Class", select "Swift File". (We don't need this class to be a subclass of anything, which is why we want just a plain Swift file.) Click next. Now you need to name your file whatever you'd like to call the data object you'll use (in my case, I named it "Item") and then click create. This will create a new file, in my case name "Item.swift", that is mostly empty at this point.
Change the import statement to read import UIKit
. (This includes Foundation, so we don't need to import it separately.) Below the import statement, write your class declaration and class properties. This is the class that we will use to hold the data we get back from the API calls. A red warning icon will appear next to your class name. This isn't anythign to worry about; it's just letting us know that we haven't defined an initializer yet, which we'll do next.
Add an initializer, including a check for empty required properties.
That's all we need to do with this class. In the Project navigator, select your table view controller class (mine is "ItemTableViewController.swift"). In order to store the list of objects that will be displayed in the table, we need to define an array of our data objects (items, in my case). So, below the class declaration, add a variable declaration.
There is a good amount of boilerplate code in the class. We'll change some of it and ignore the rest. Find the // MARK: - Table view data source
comment.
In the first function under the comment, remove the comment from inside the function and change the return statement to return 1
. In the next function, remove the comment and change the return statement to return items.count
(or whatever you named your array variable .count). The next function is commented out, but we are going to use it, so remove the comment characters /*
and */
before and after the function. We're going to define a constant that holds the identifier we previously assigned to the prototype cell, as the first line of the function body: let cellIdentifier = "itemCell"
. Next, we'll change the following line:
let cell = tableView.dequeueReusableCellWithIdentifier("reuseIdentifier", forIndexPath: indexPath)
to read let cell = tableView.dequeueReusableCellWithIdentifier(cellIdentifier, forIndexPath: indexPath) as! ItemTableViewCell
Finally, we'll add:
let item = items[indexPath.row]
cell.nameLabel.text = item.name
cell.weightLabel.text = String(format: "%0.2f", item.weight!) + " lb"
cell.valueLabel.text = "$" + String(format: "%0.2f", item.value!)
We're done editing our custom classes for the time being, and will move on to adding some navigation between scenes.
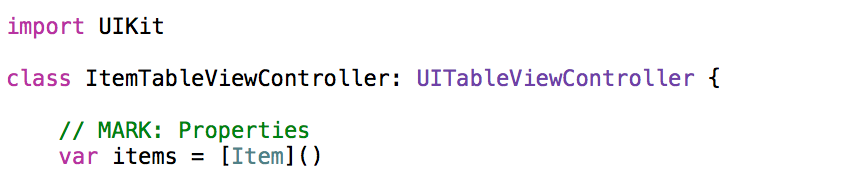
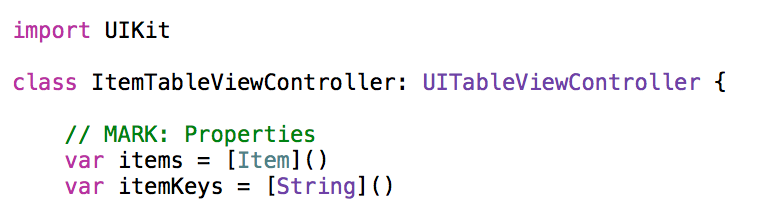
Now we're ready to add in the code for our first API call, which will retrieve a list of item keys. Go back to the Standard editor and, in the Project navigator, select ItemTableViewController.swift. We need to add a variable here to hold the list of item keys that we get back from the API call. Below the items
variable declaration, add the following: var itemKeys = [String]()
.
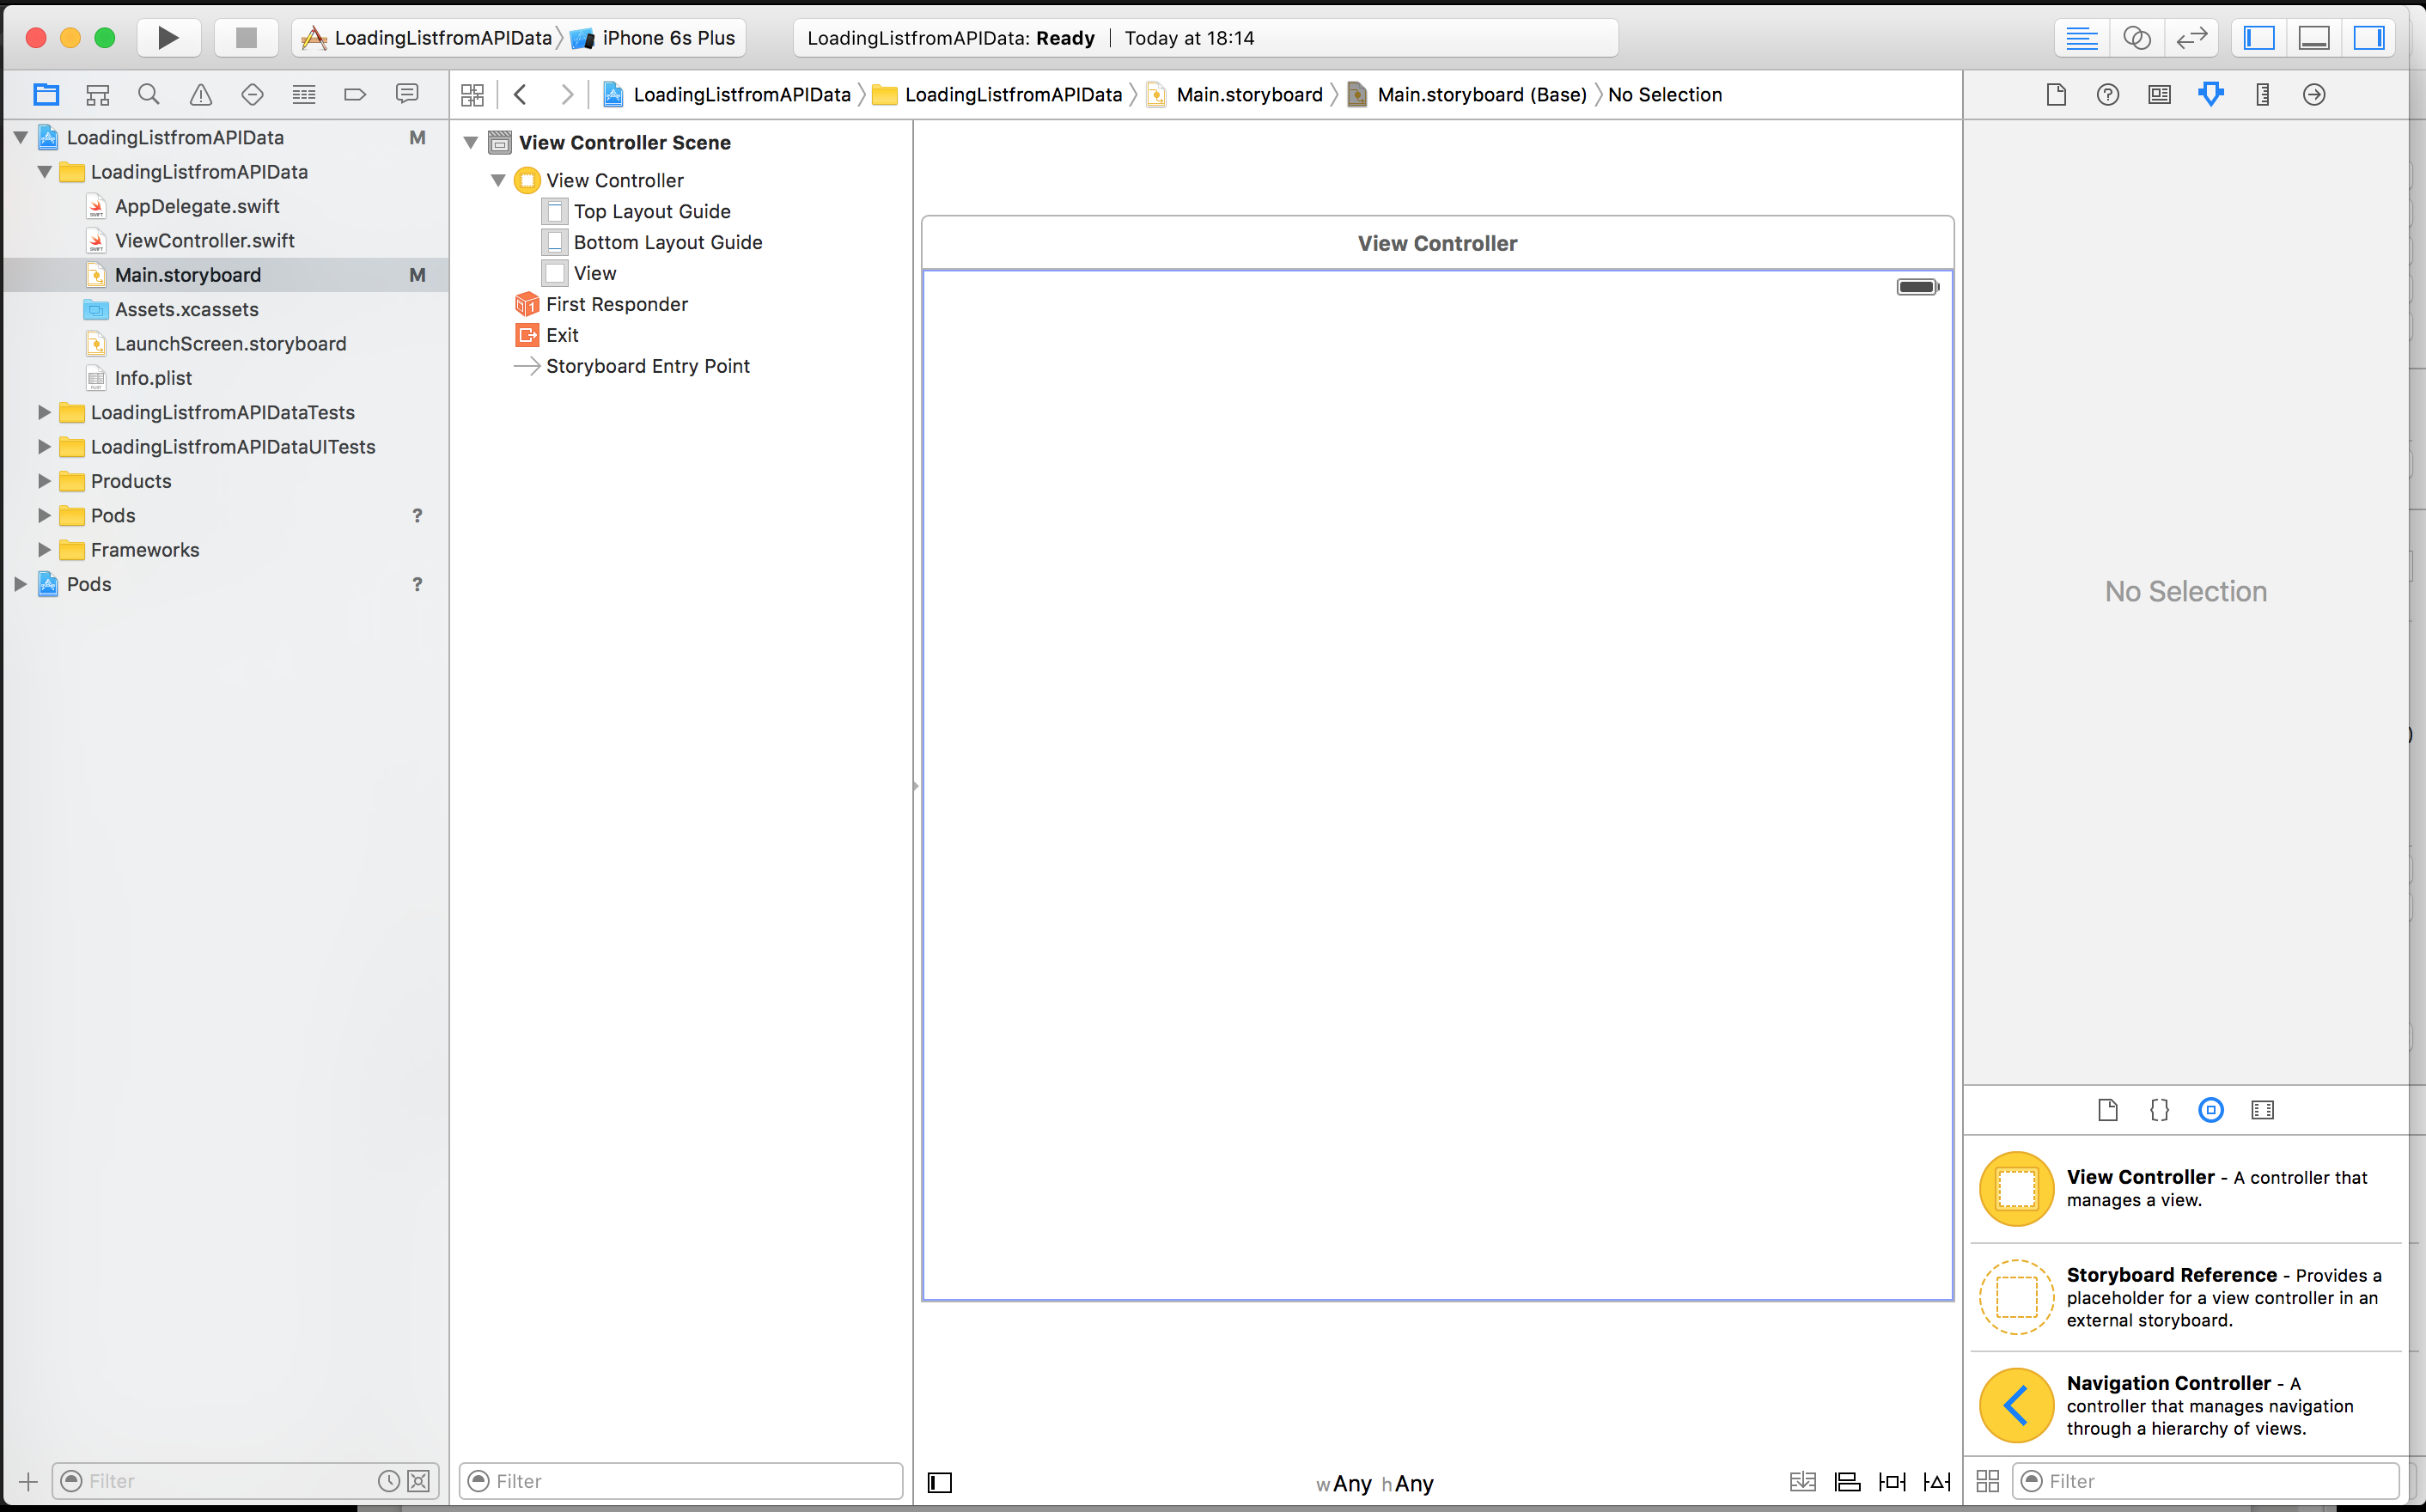
In the Project navigator, select ViewController.swift. Below the last function (but still within the class), add the following:
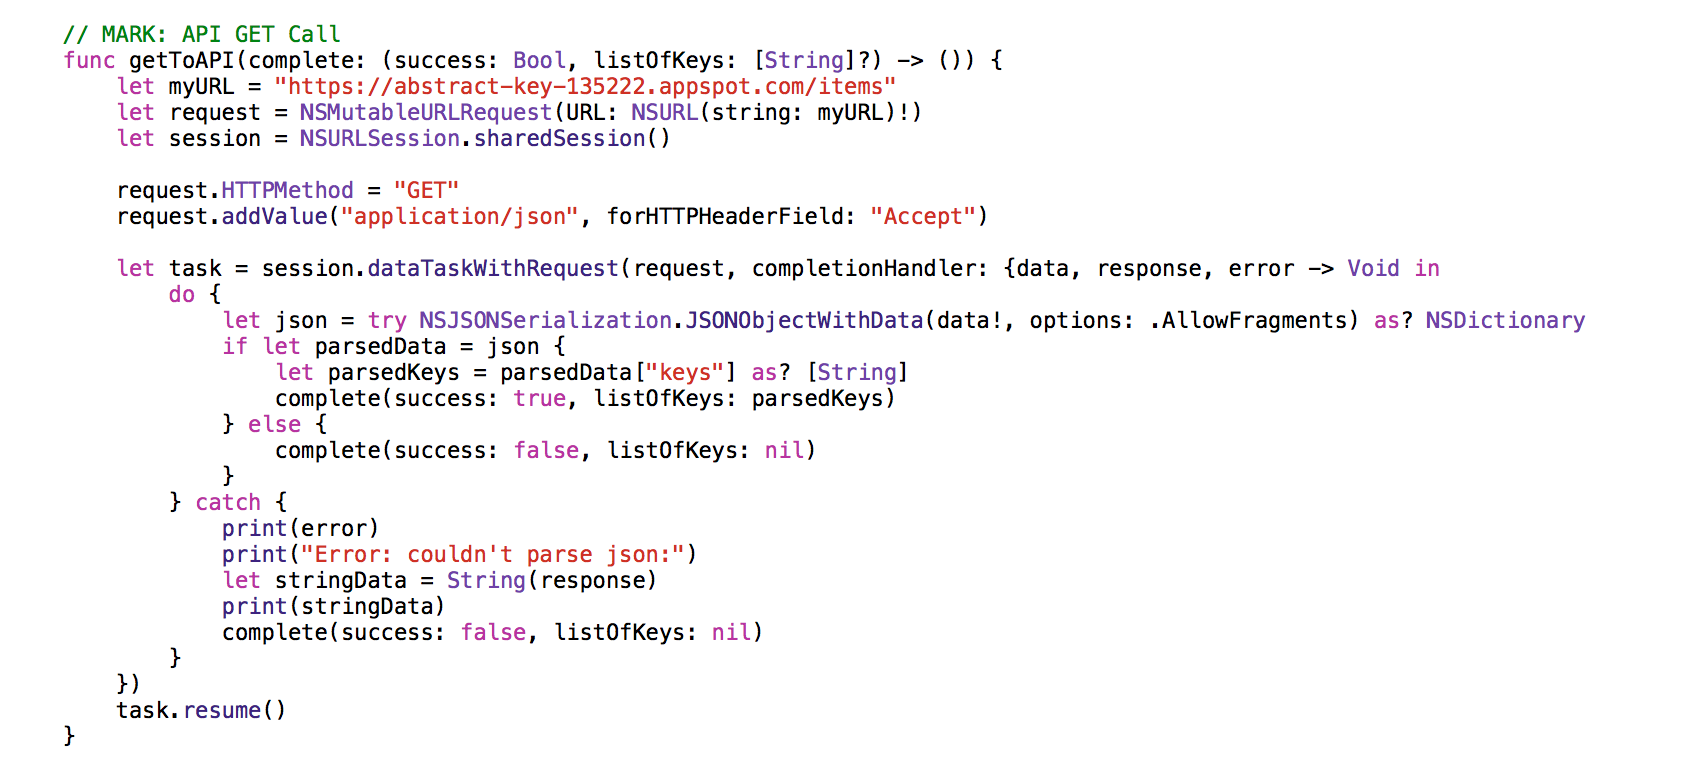
This is the function that actually makes the call to the API to retrieve a list of item keys. It doesn't take any parameters, except for the function to call when the API callback completes. It sets up the HTTP request as a GET that accepts a JSON object, and then defines the callback function that will be automatically called when the request completes. The callback parses the received JSON object as a NSDictionary object for use in the application. If the parsing completes successfully, the list of keys is copied into an array and passed to the completion function, with the success bool set to true. If the parsing fails, the list of keys is set to nil and the success bool is set to false. Outside of the callback definition, the task is resumed, which allows the operation of the application to continue while the API call is processing.
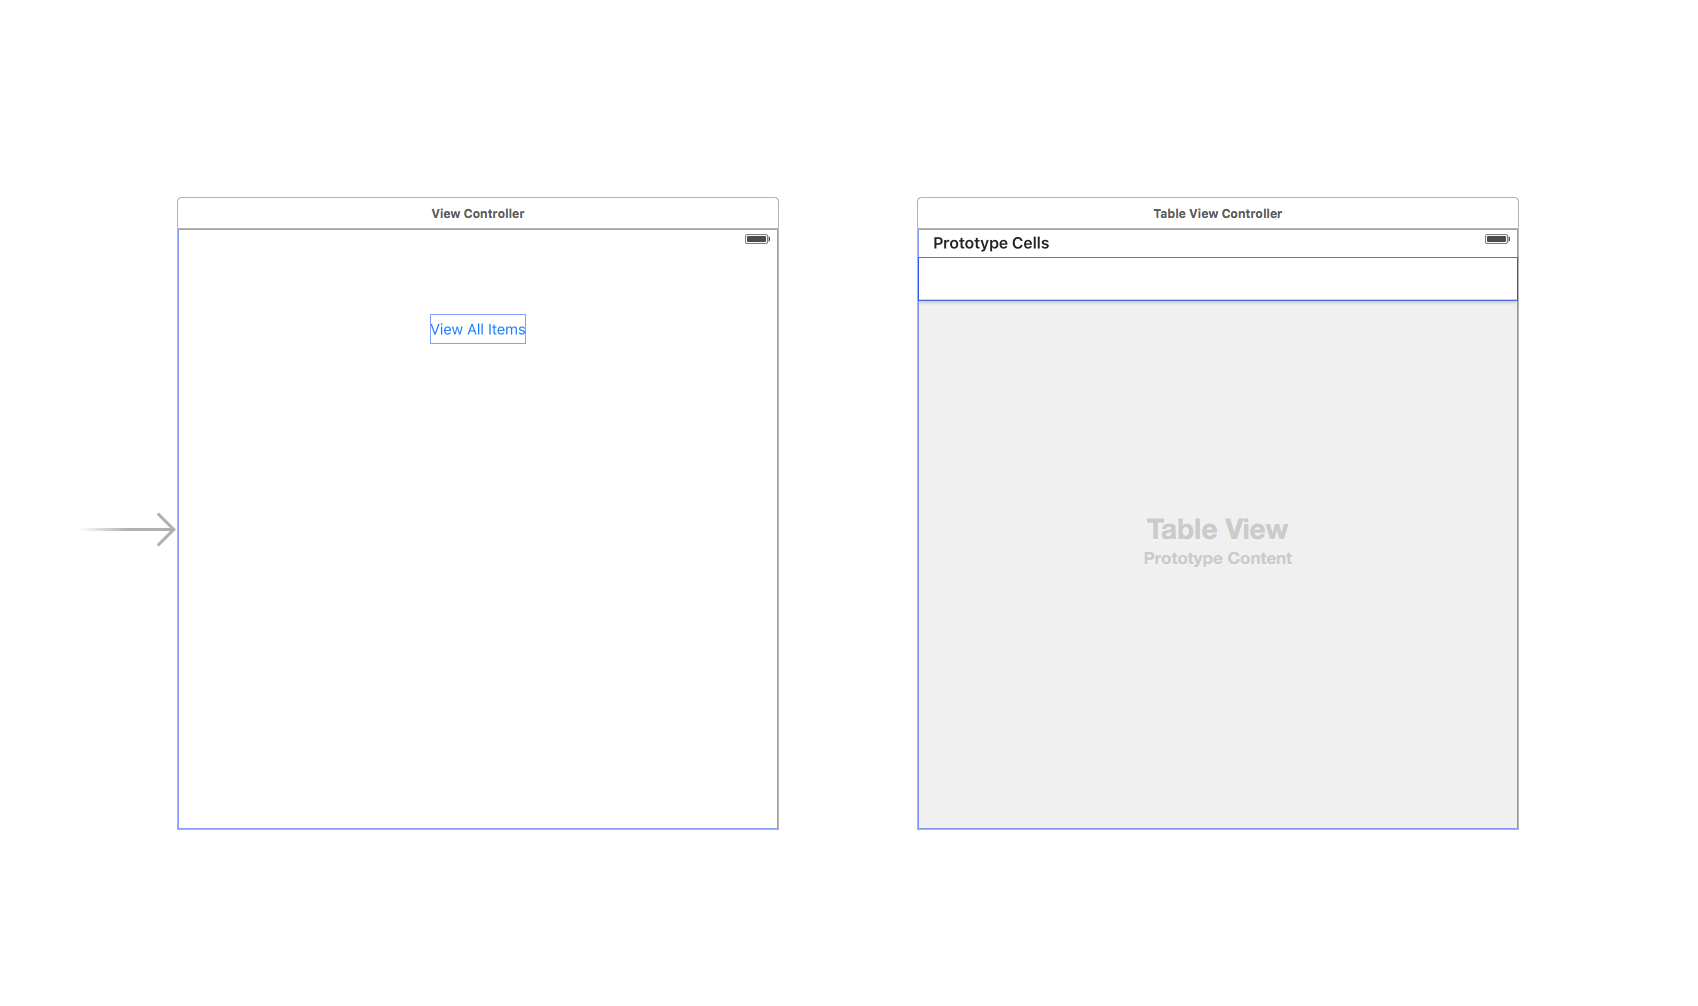
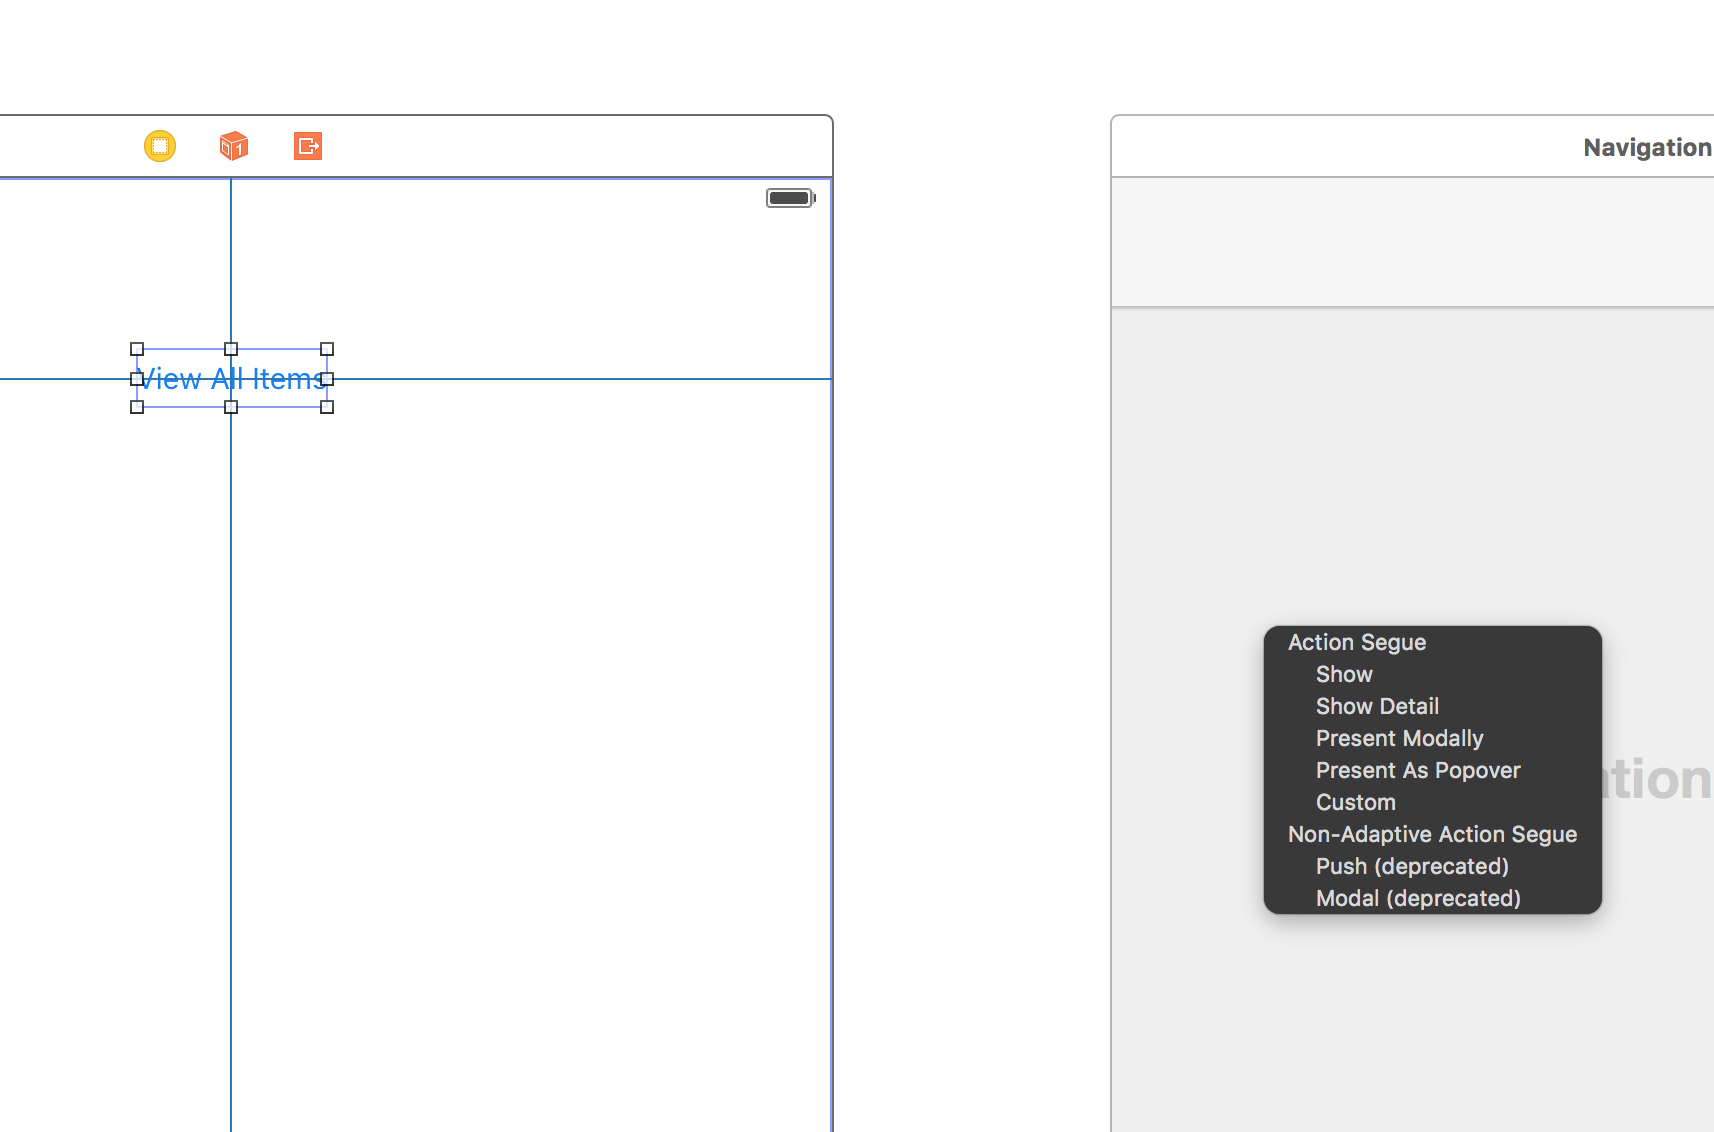
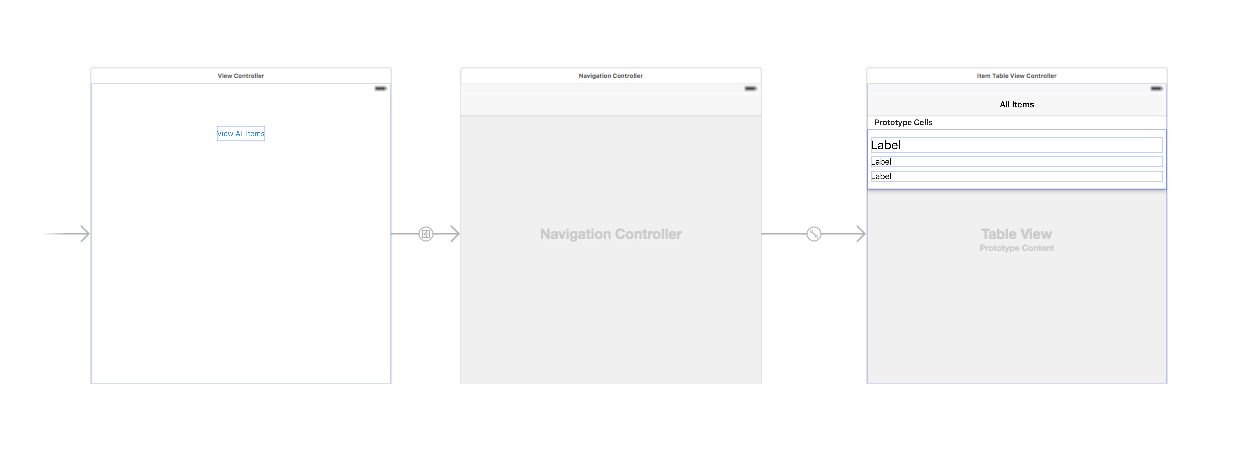
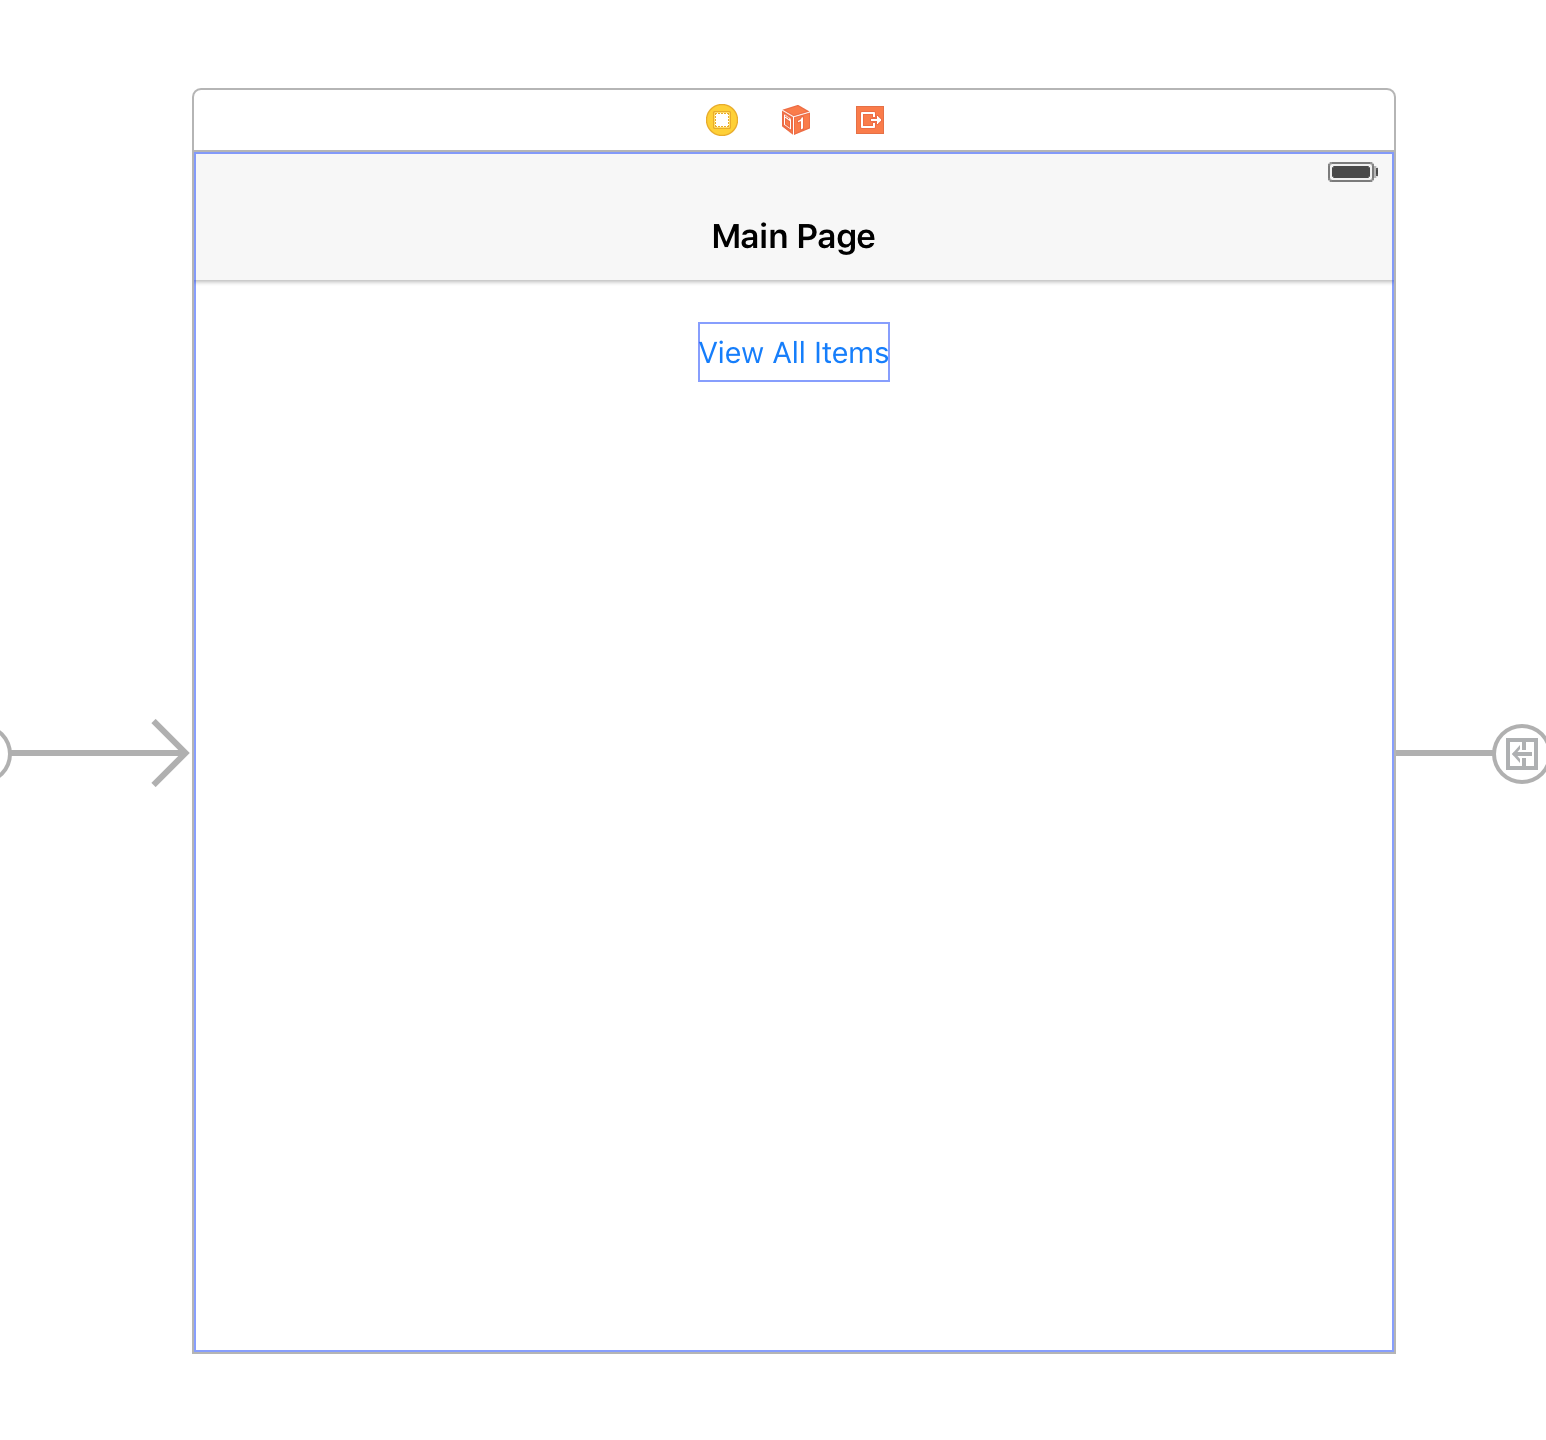
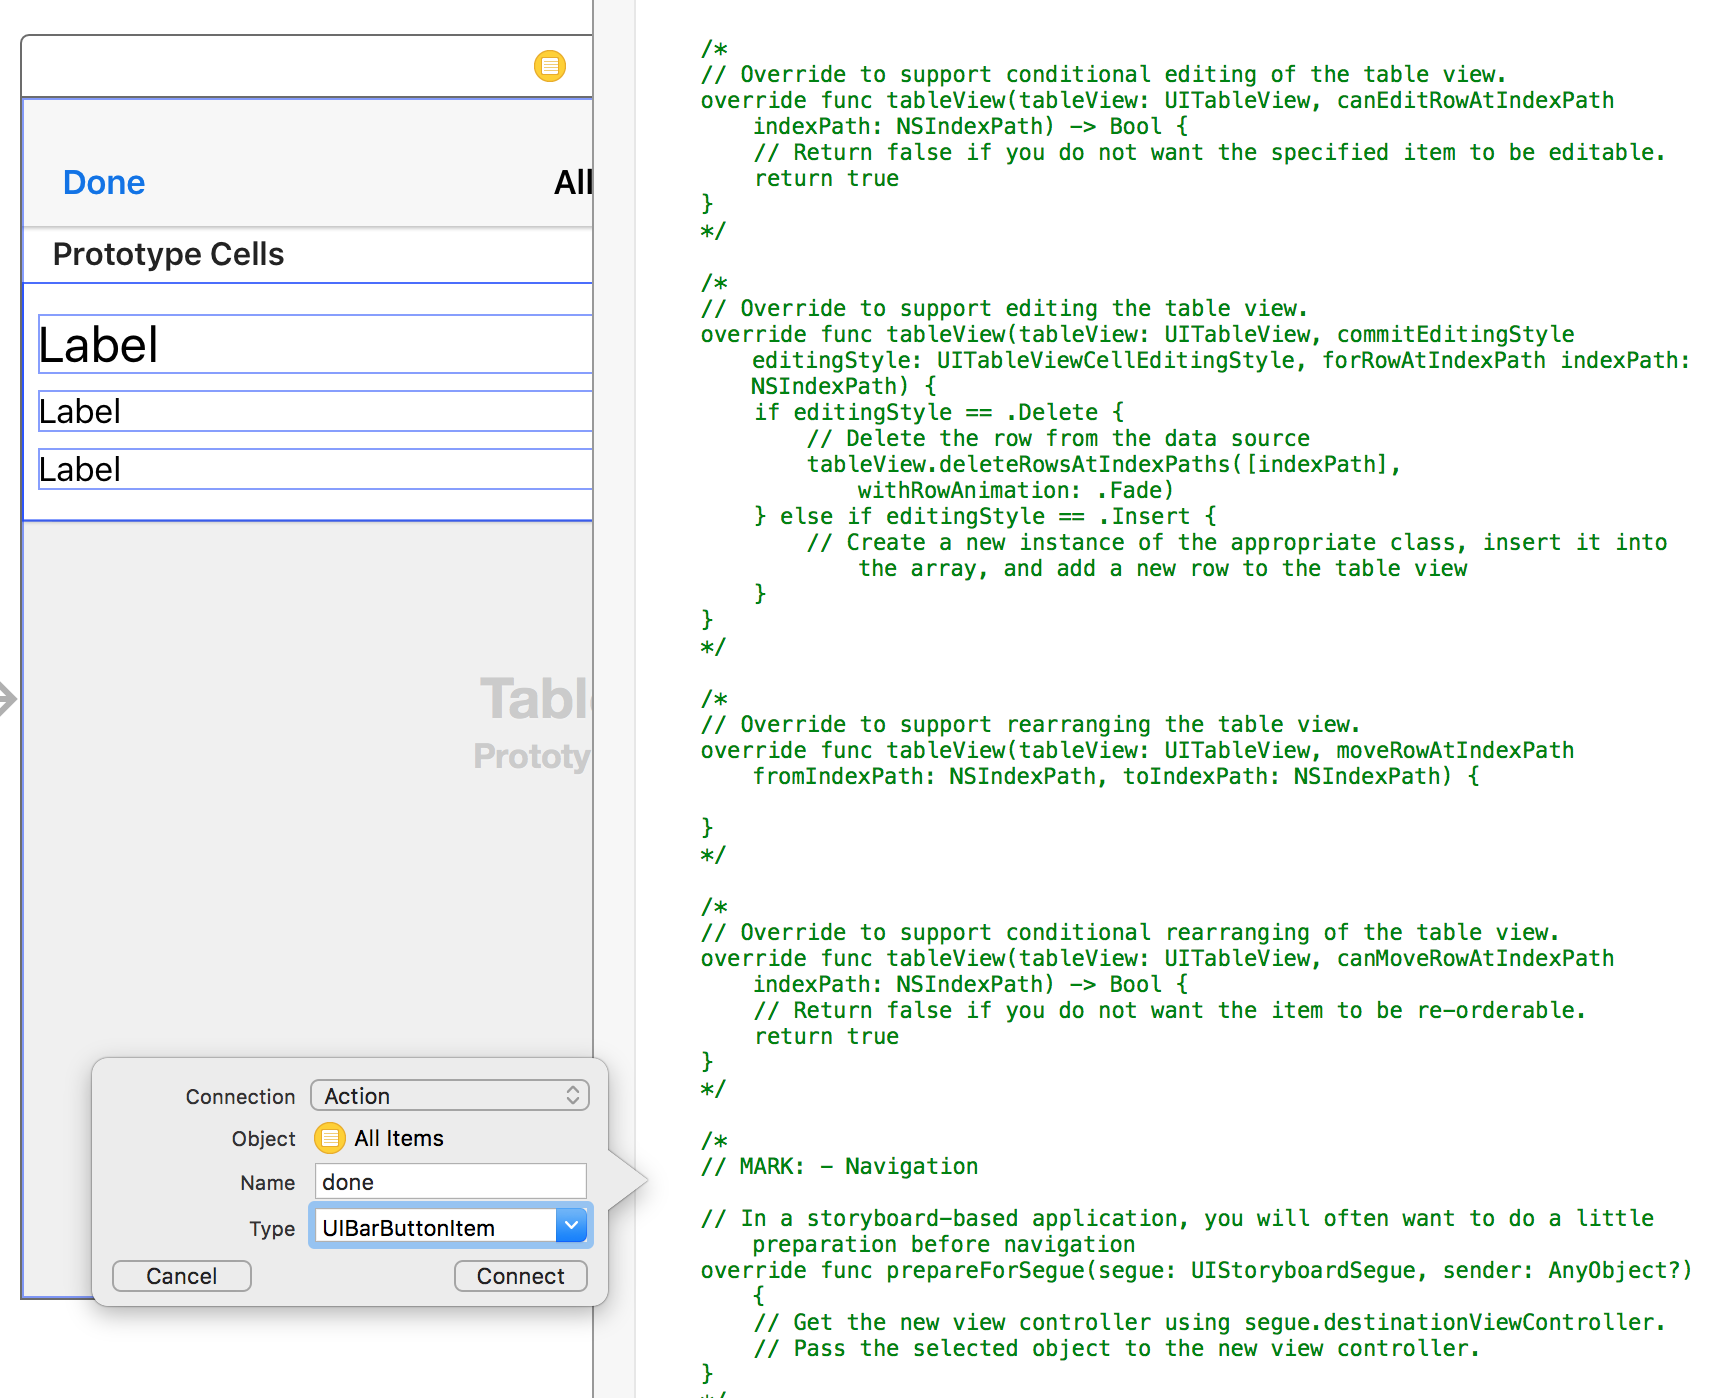
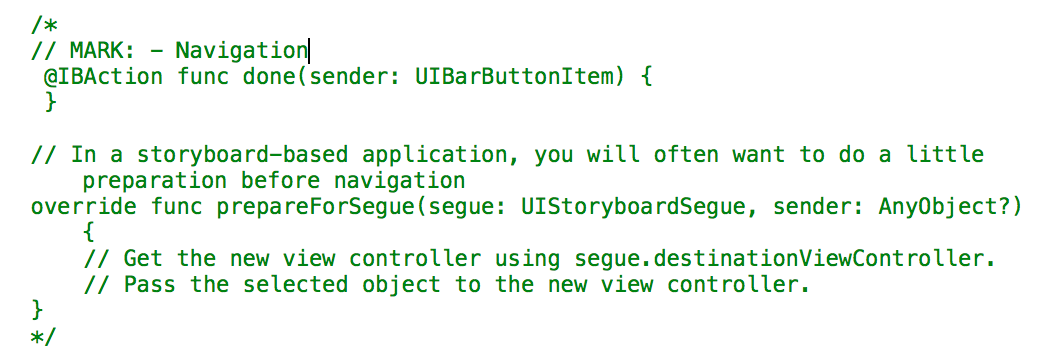
Now that we have the function that will make the call to the API, we need to actually call it. We'll call it in prepareForSegue, which is automatically called when a segue is triggered from this scene (which will be the case when the "View All Items" button is pressed). We'll add prepareForSegue after the previous function:
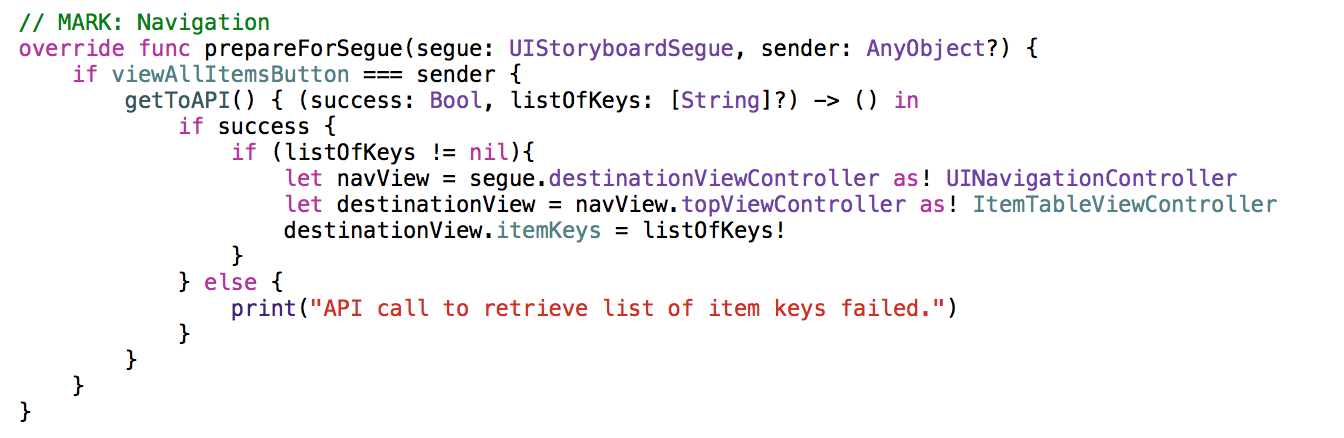
This function begins with a check to see if the viewAllItemsButton was the sender for the segue. This is currently the only possible sender, however it is a good check to include as it is not uncommon to have multiple possible senders as you develop the app further. Then the function simply calls getToAPI and, in doing so, defines the completion function (this is the function that gets called when complete is called in getToAPI). The completion function checks for success and then sets the itemKeys variable in the destination view (which is in ItemTableViewController.swift) to the received list of item keys.
The following JSON object is an example of the response from this API call:
{"keys": ["ahVzfmFic3RyYWN0LWtleS0xMzUyMjJyEQsSBEl0ZW0YgICAgO2xgwkM", "ahVzfmFic3RyYWN0LWtleS0xMzUyMjJyEQsSBEl0ZW0YgICAgKvzhwkM", "ahVzfmFic3RyYWN0LWtleS0xMzUyMjJyEQsSBEl0ZW0YgICAgLqNiQkM", "ahVzfmFic3RyYWN0LWtleS0xMzUyMjJyEQsSBEl0ZW0YgICAgOvJkQkM", "ahVzfmFic3RyYWN0LWtleS0xMzUyMjJyEQsSBEl0ZW0YgICAgO2tkgkM", "ahVzfmFic3RyYWN0LWtleS0xMzUyMjJyEQsSBEl0ZW0YgICAgOu2gAoM", "ahVzfmFic3RyYWN0LWtleS0xMzUyMjJyEQsSBEl0ZW0YgICAgL7xiwoM", "ahVzfmFic3RyYWN0LWtleS0xMzUyMjJyEQsSBEl0ZW0YgICAgL6WkgoM", "ahVzfmFic3RyYWN0LWtleS0xMzUyMjJyEQsSBEl0ZW0YgICAgPiWlQoM", "ahVzfmFic3RyYWN0LWtleS0xMzUyMjJyEQsSBEl0ZW0YgICAgOuHmQoM", "ahVzfmFic3RyYWN0LWtleS0xMzUyMjJyEQsSBEl0ZW0YgICAgK_hmQoM", "ahVzfmFic3RyYWN0LWtleS0xMzUyMjJyEQsSBEl0ZW0YgICAgL7tmgoM", "ahVzfmFic3RyYWN0LWtleS0xMzUyMjJyEQsSBEl0ZW0YgICAgPjtnQoM"]}
Now, before we make the API calls that will retrieve the details for each item, we need to add the loading animation to our table scene. This will give the user immediate feedback after pressing the "View All Items" button (before the data is all returned from the API calls).
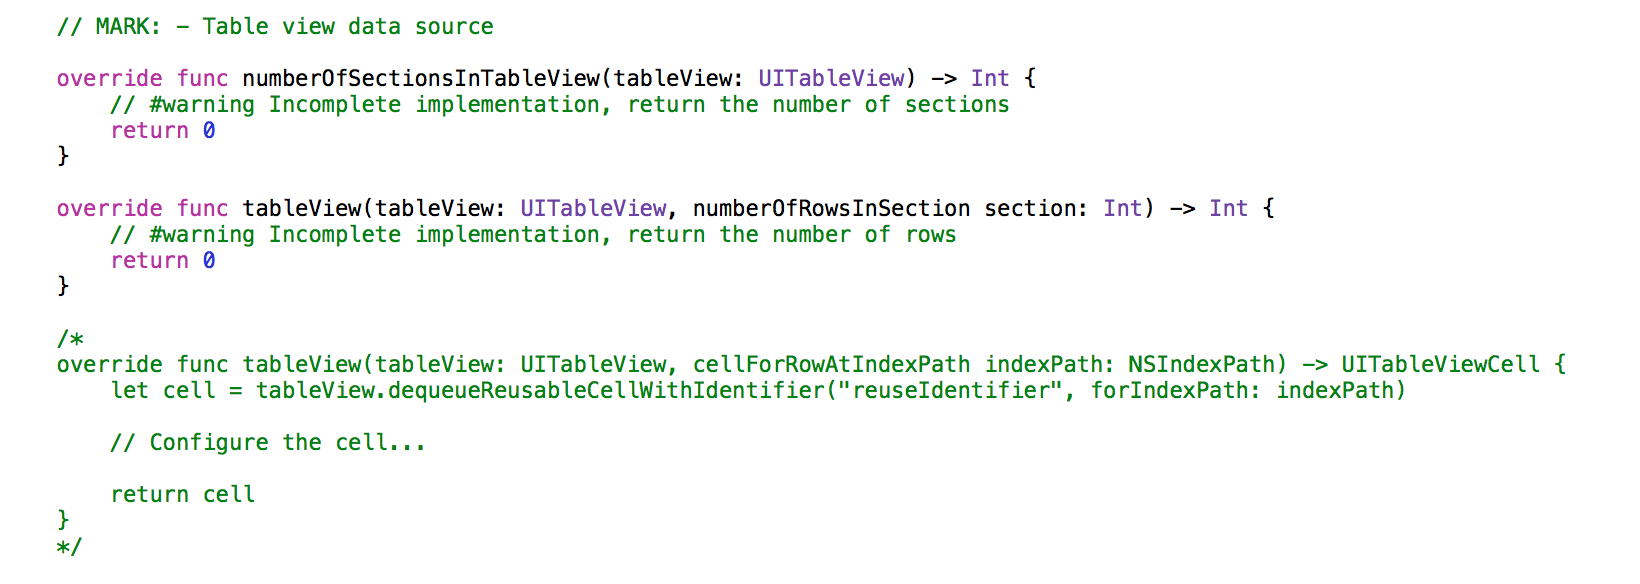
In the Project navigator, select ItemTableViewController.swift. Remove the comments from inside viewDidLoad, and add the following after super.viewDidLoad()
:
let item1 = Item(name: "Loading", id: "temp", weight: 0, value: 0)!
items += [item1]
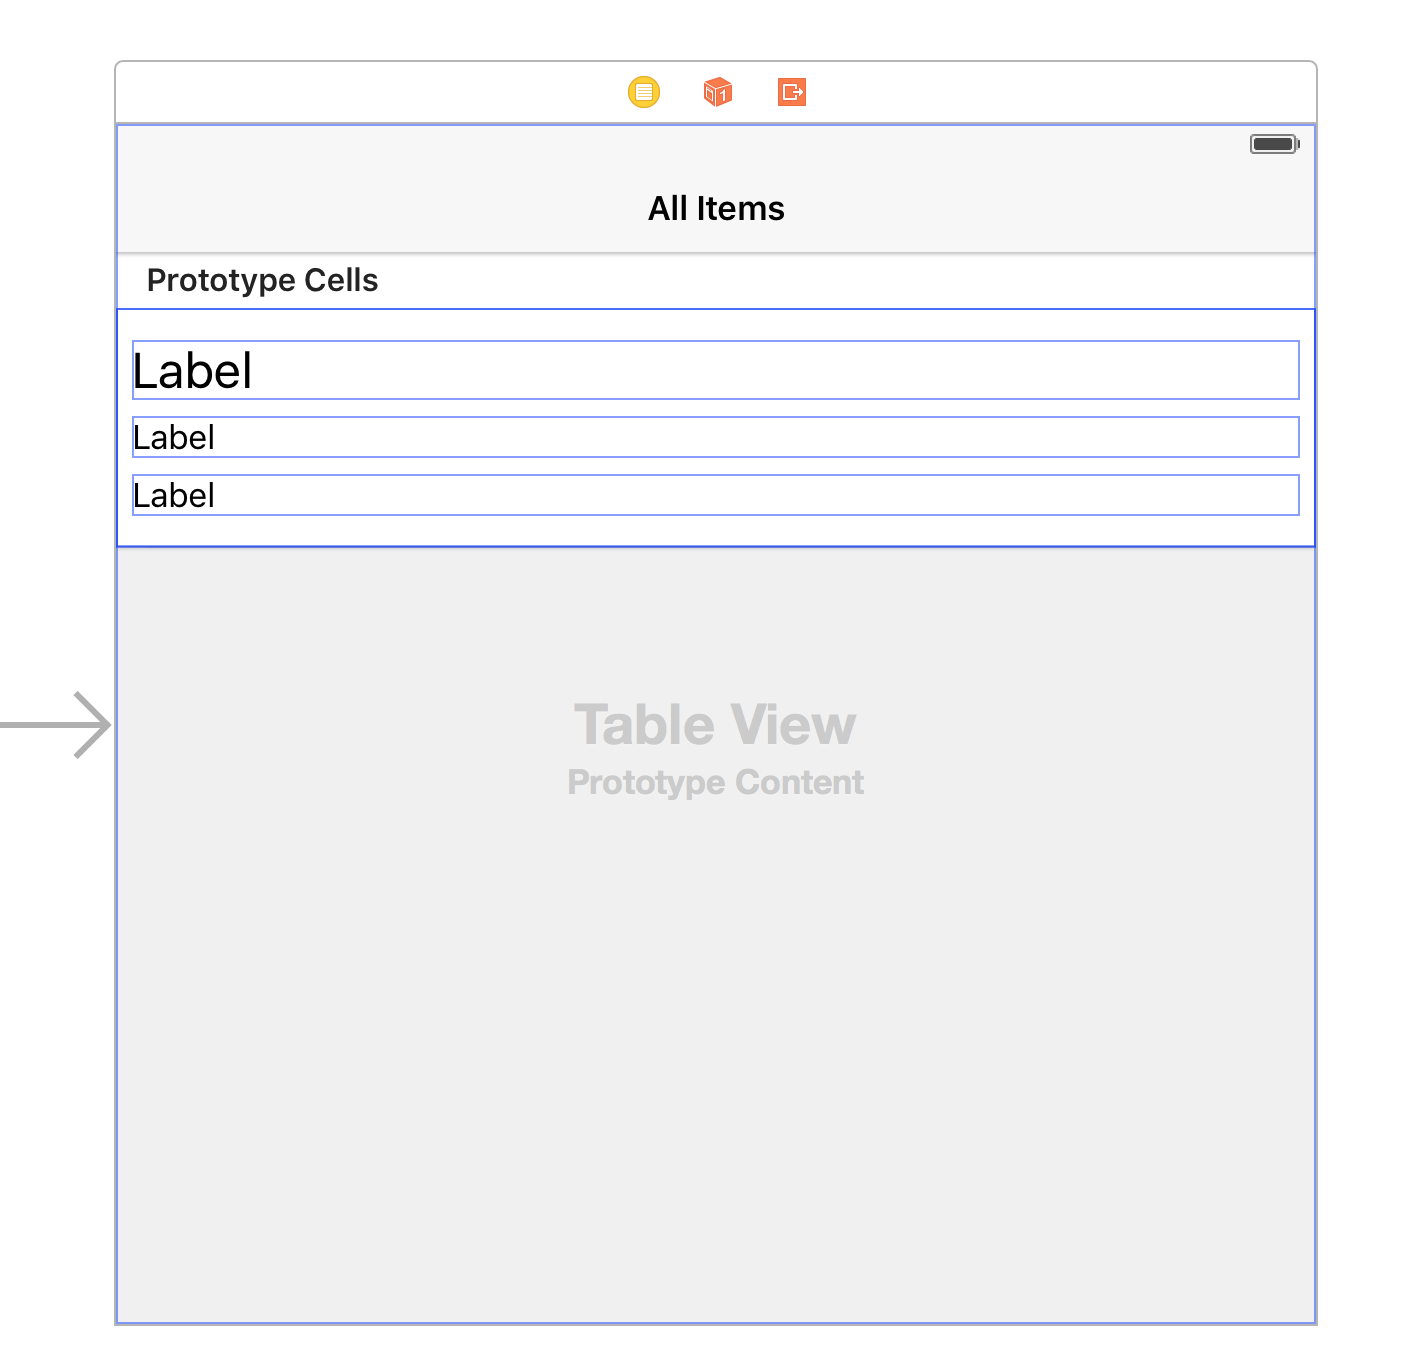
This will put a placeholder row in the table while our API calls complete. However, instead of seeing an item named "Loading", it would convey the message much more smoothly to the user to see a loading animation. We want to be able to choose between showing the name, weight, and value labels and showing the loading animation within the same cell. In order to do this, we need to add a pair of views to our prototype cell.
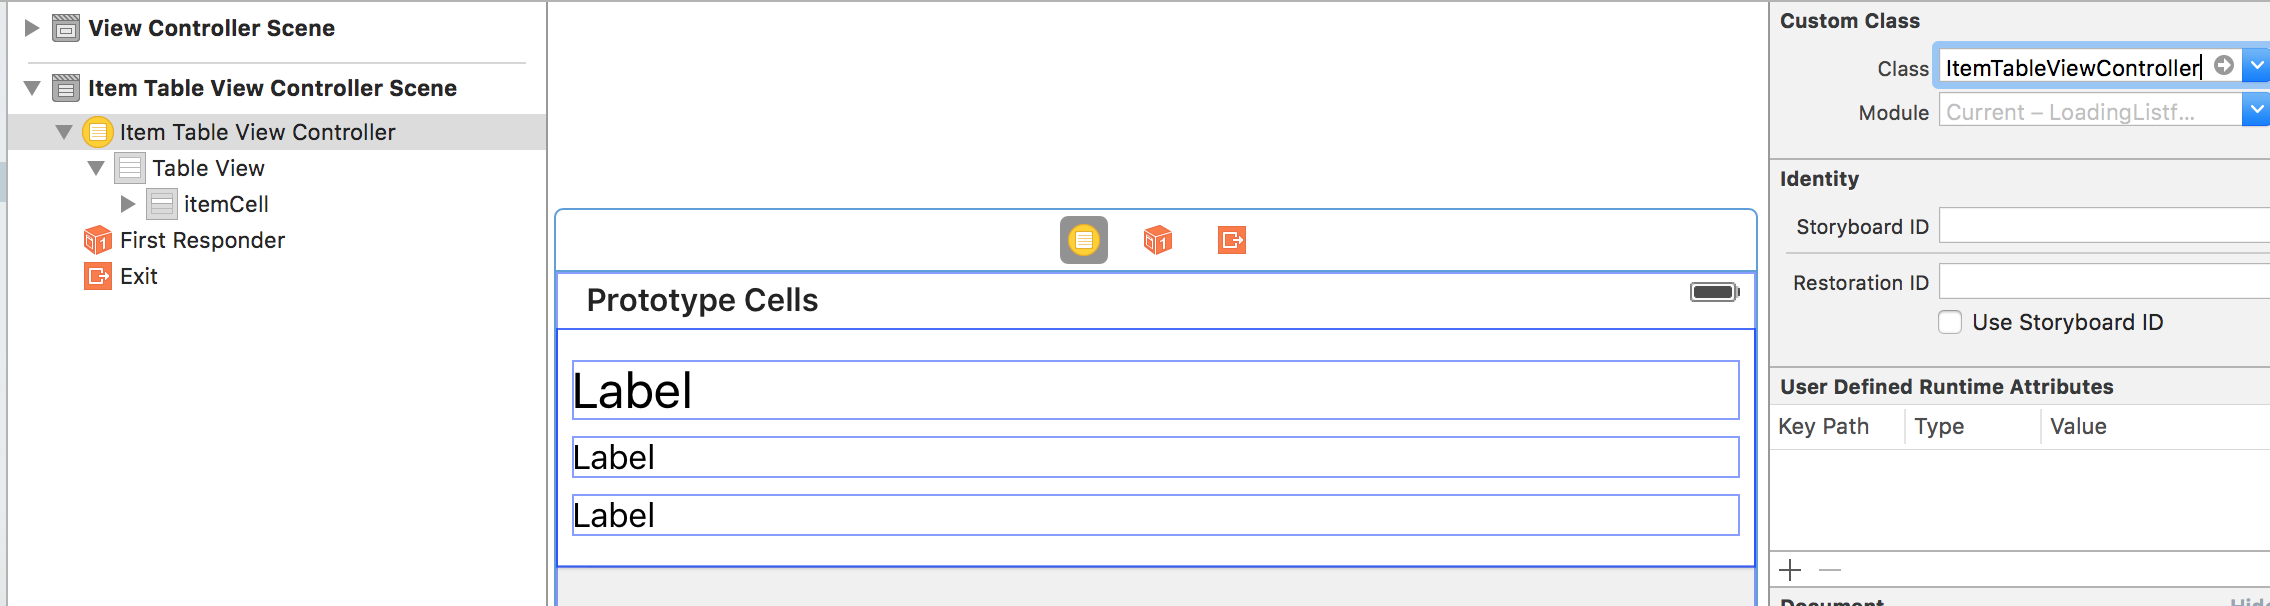
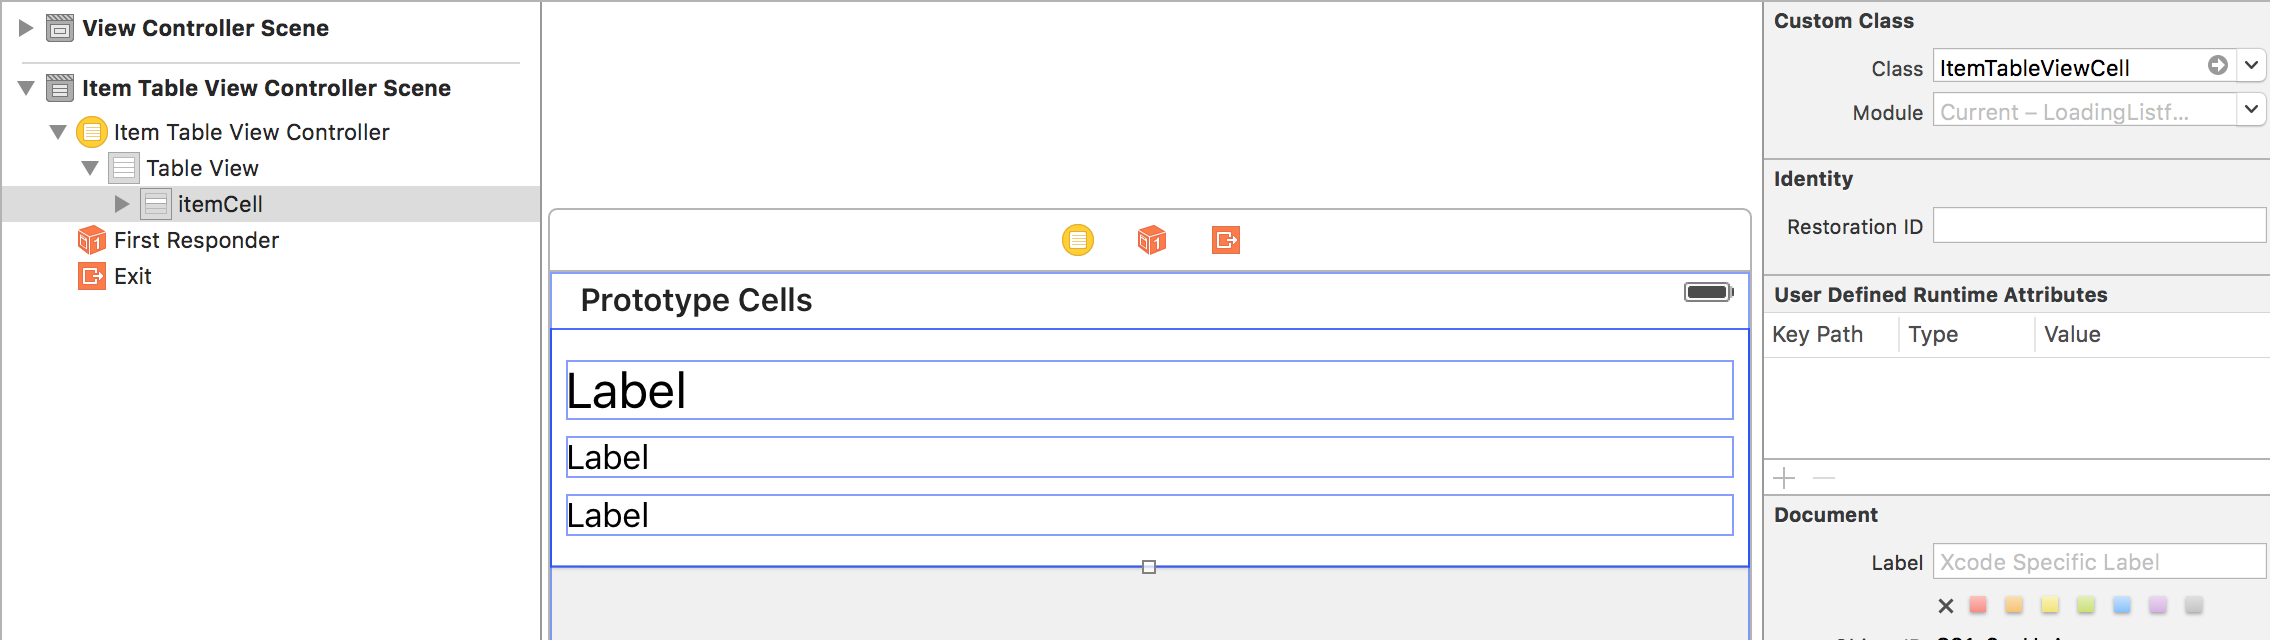
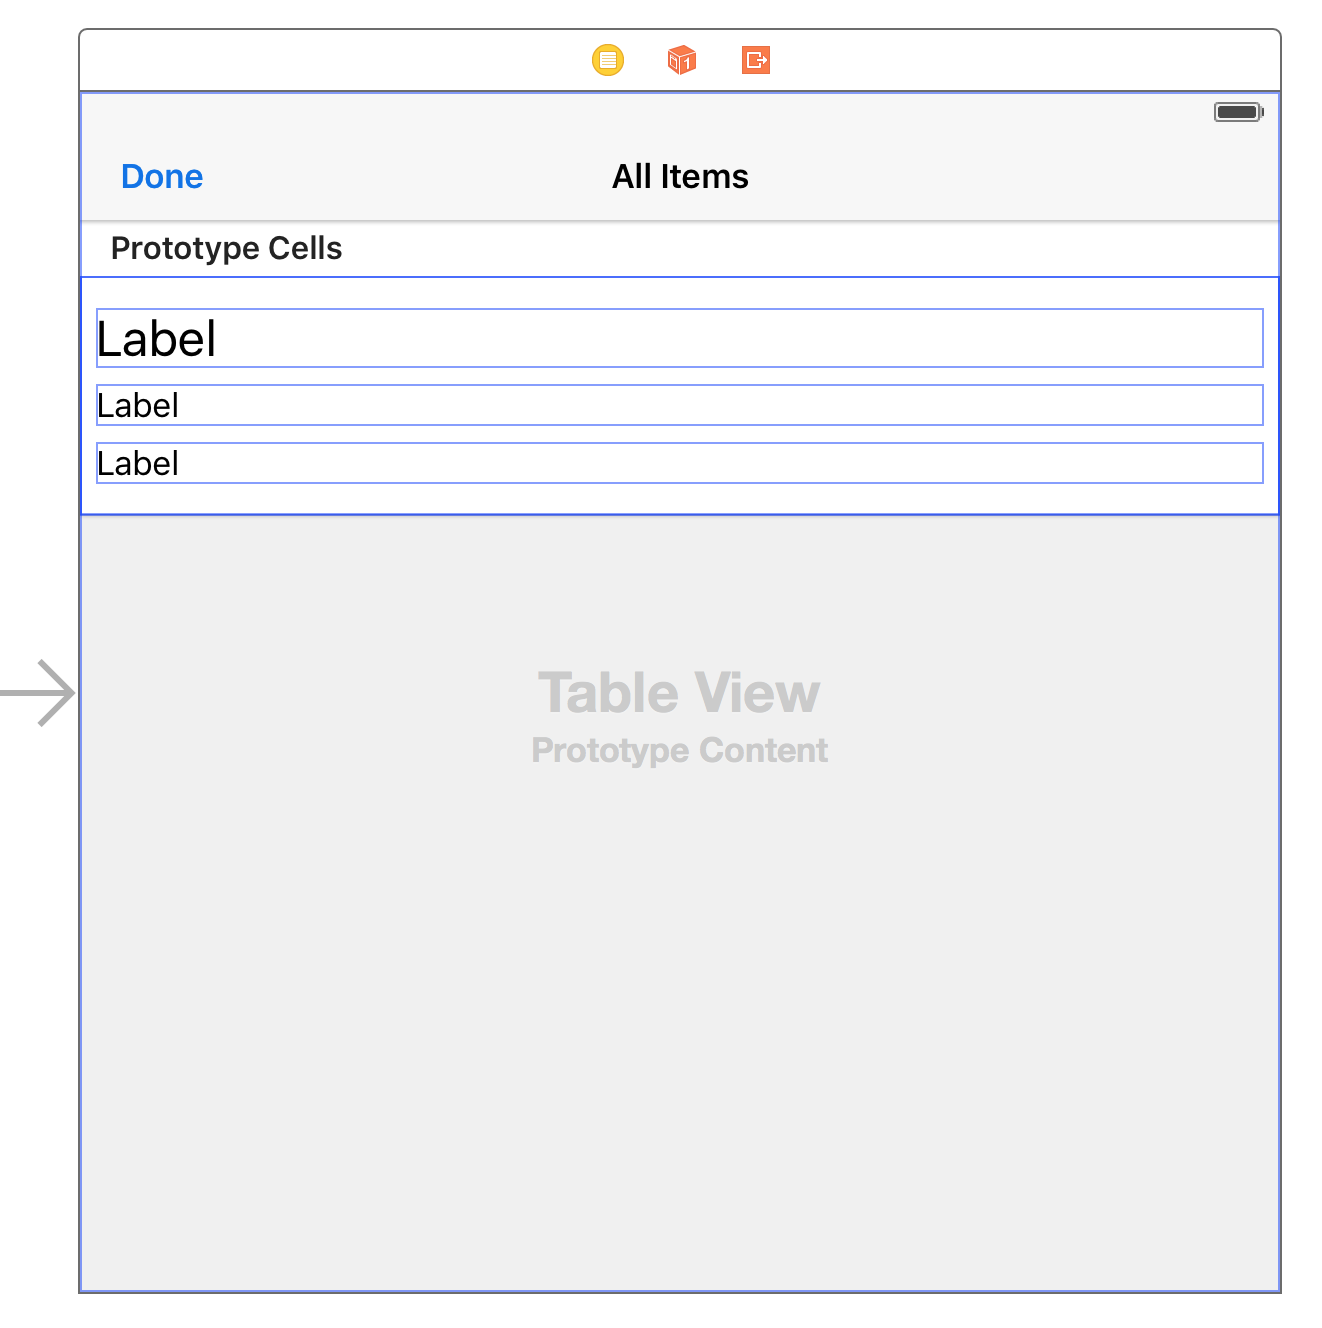
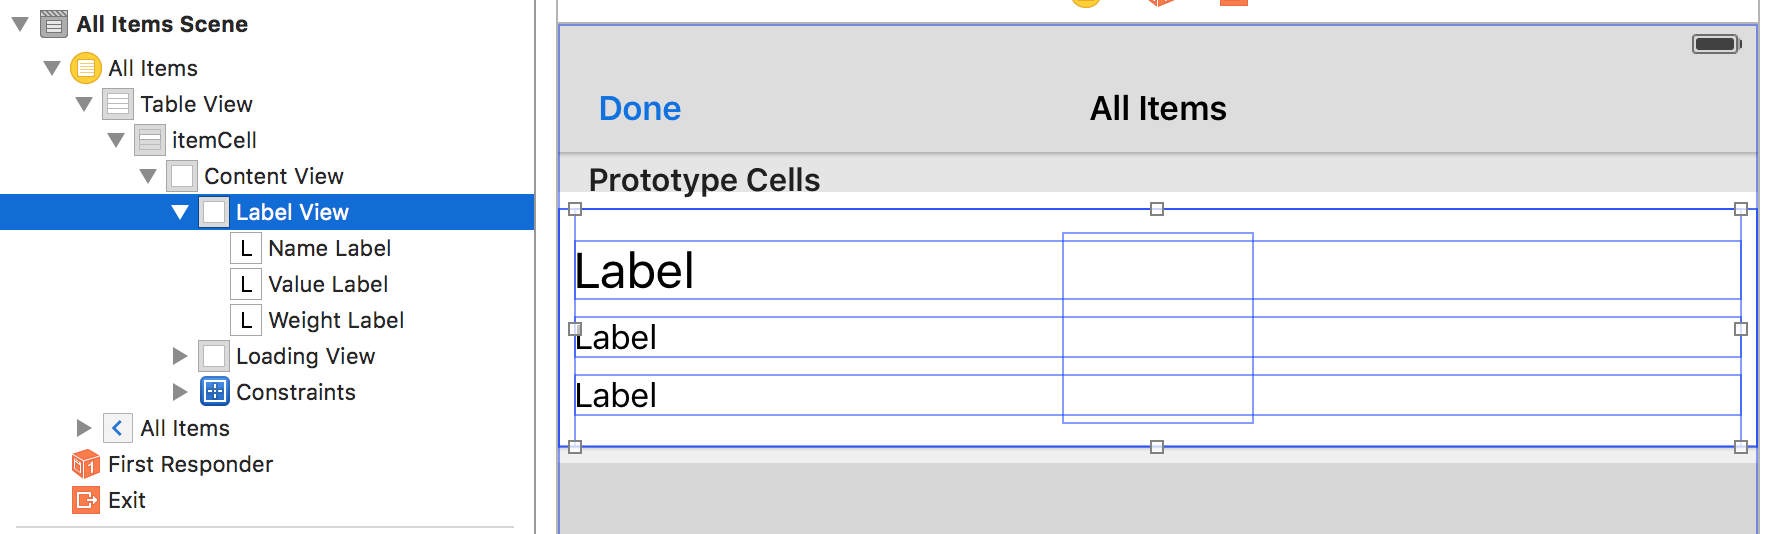
Select Main.storyboard from the Project navigator and then select the cell (mine is called "itemCell") from the Document Outline. Search for "view" in the Object library and drag a View object onto the cell. In the Size inspector, set the Height and Width to 96. Next, click the pin icon and check the boxes for Height and Width (with a value of 96 for both). Set Update Frames to "Items of New Constraints", and then click "Add 2 Constraints".
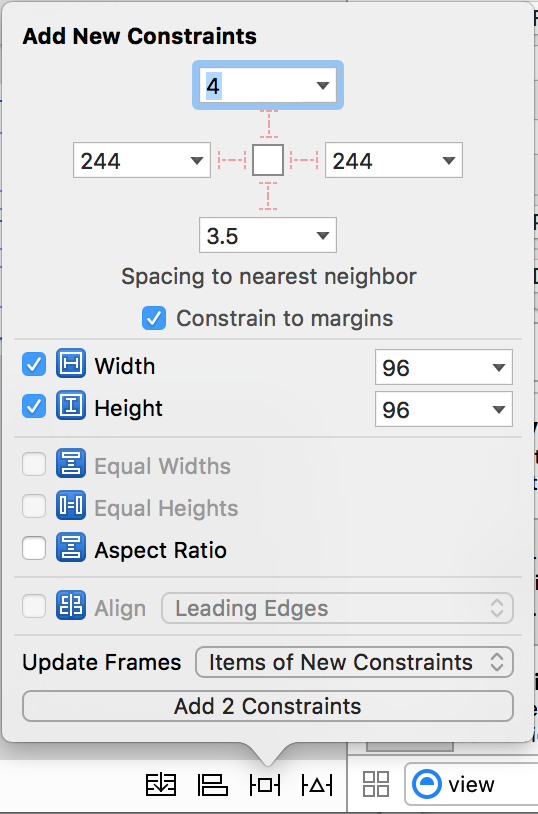
Now the size of the view is set, we need to set its alignment in the cell. Click on the Align icon and check the boxes in the pop-up window for Horizontally in Container and Vertically in Container (with a value of 0 for each). Once more, set Update Frames to "Items of New Constraints", and then click "Add 2 Constraints". This will center the view in the cell.
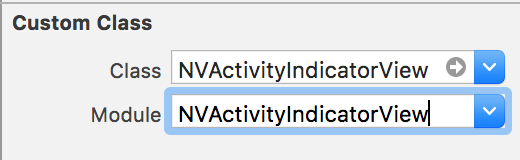
In the Identity inspector, select "NVActivityView" for the Class and Module fields. This is the class that we imported during set-up, which contains the loading animations. In the Attributes inspector, type the name of your chosen animation type into the Type Name field (I chose BallScaleRippleMultiple, view the class documentation here to see the animation options), select the color you'd like, and set Hides When Stopped to "On". This last field setting mean that when the animation isn't playing, the view will be hidden, so we won't have to manually show and hide it.
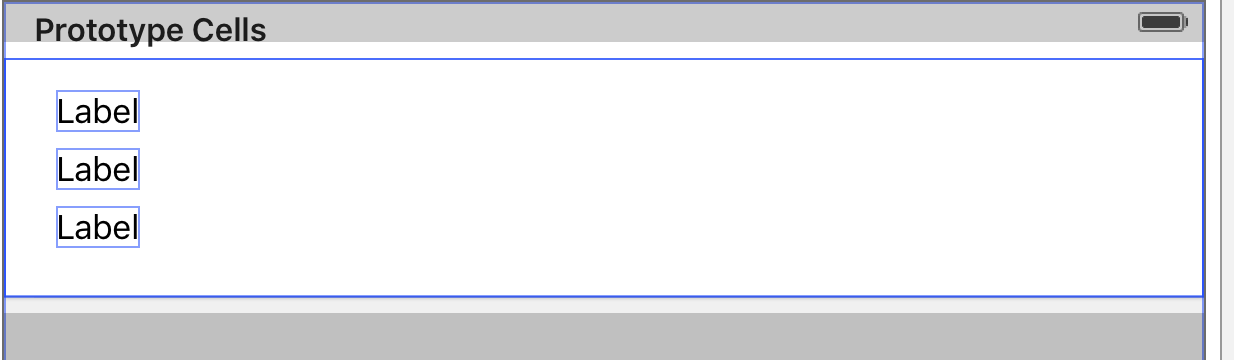
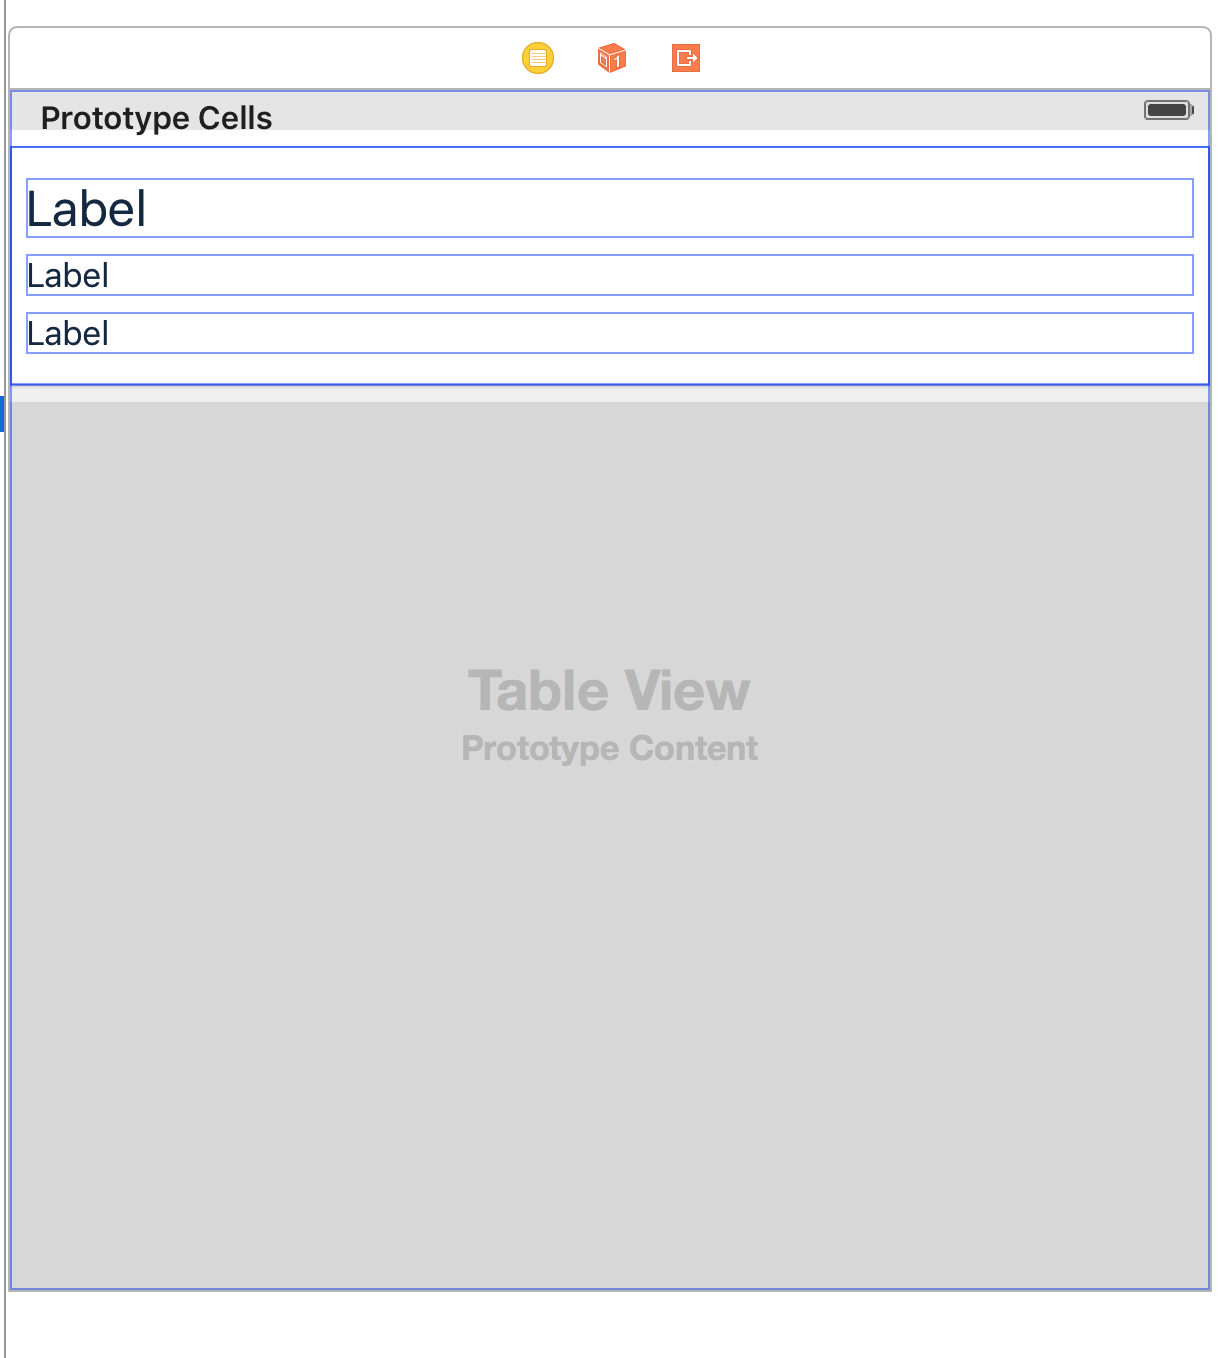
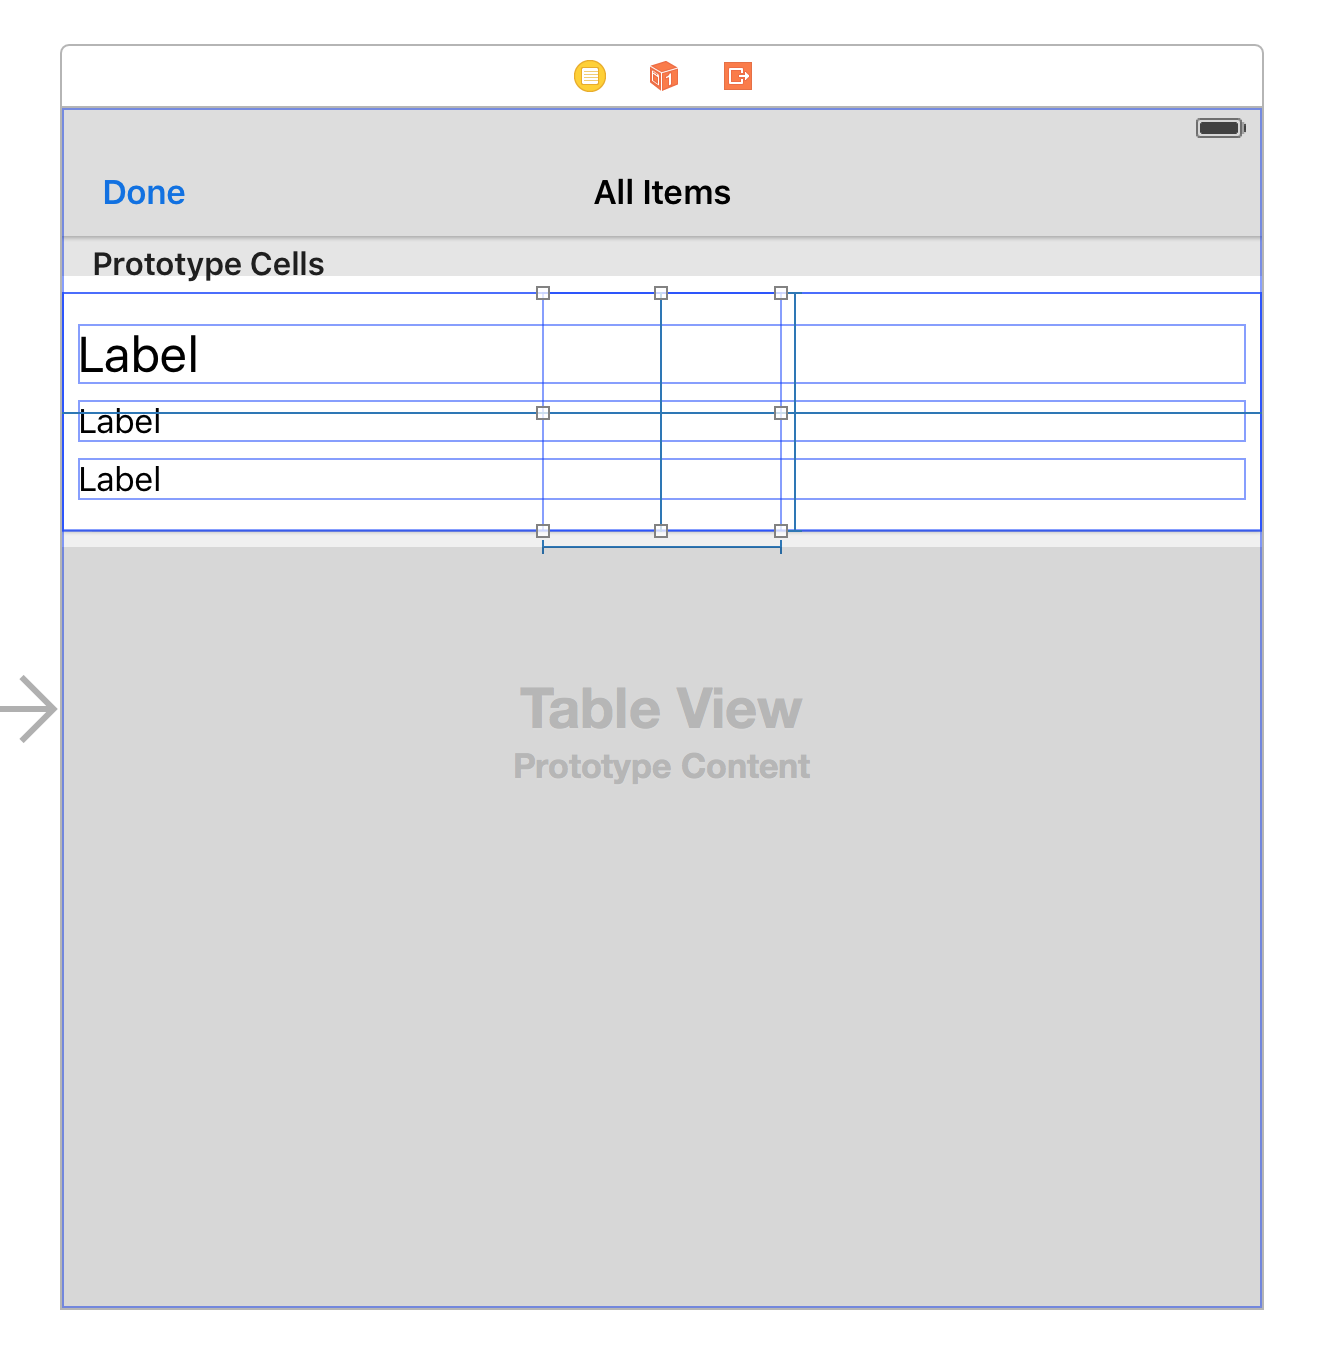
Next, since we want to hide the labels when we show the loading animation, we need to place the labels in their own view. To do this, drag another View object onto the cell. Then, resize it so that it's at least as big as the space the labels take up. Select all three labels in the Document Outline and drag them below the new view so they are now inside that view. This may stack them all on top of one another; respace them so they no longer overlap.
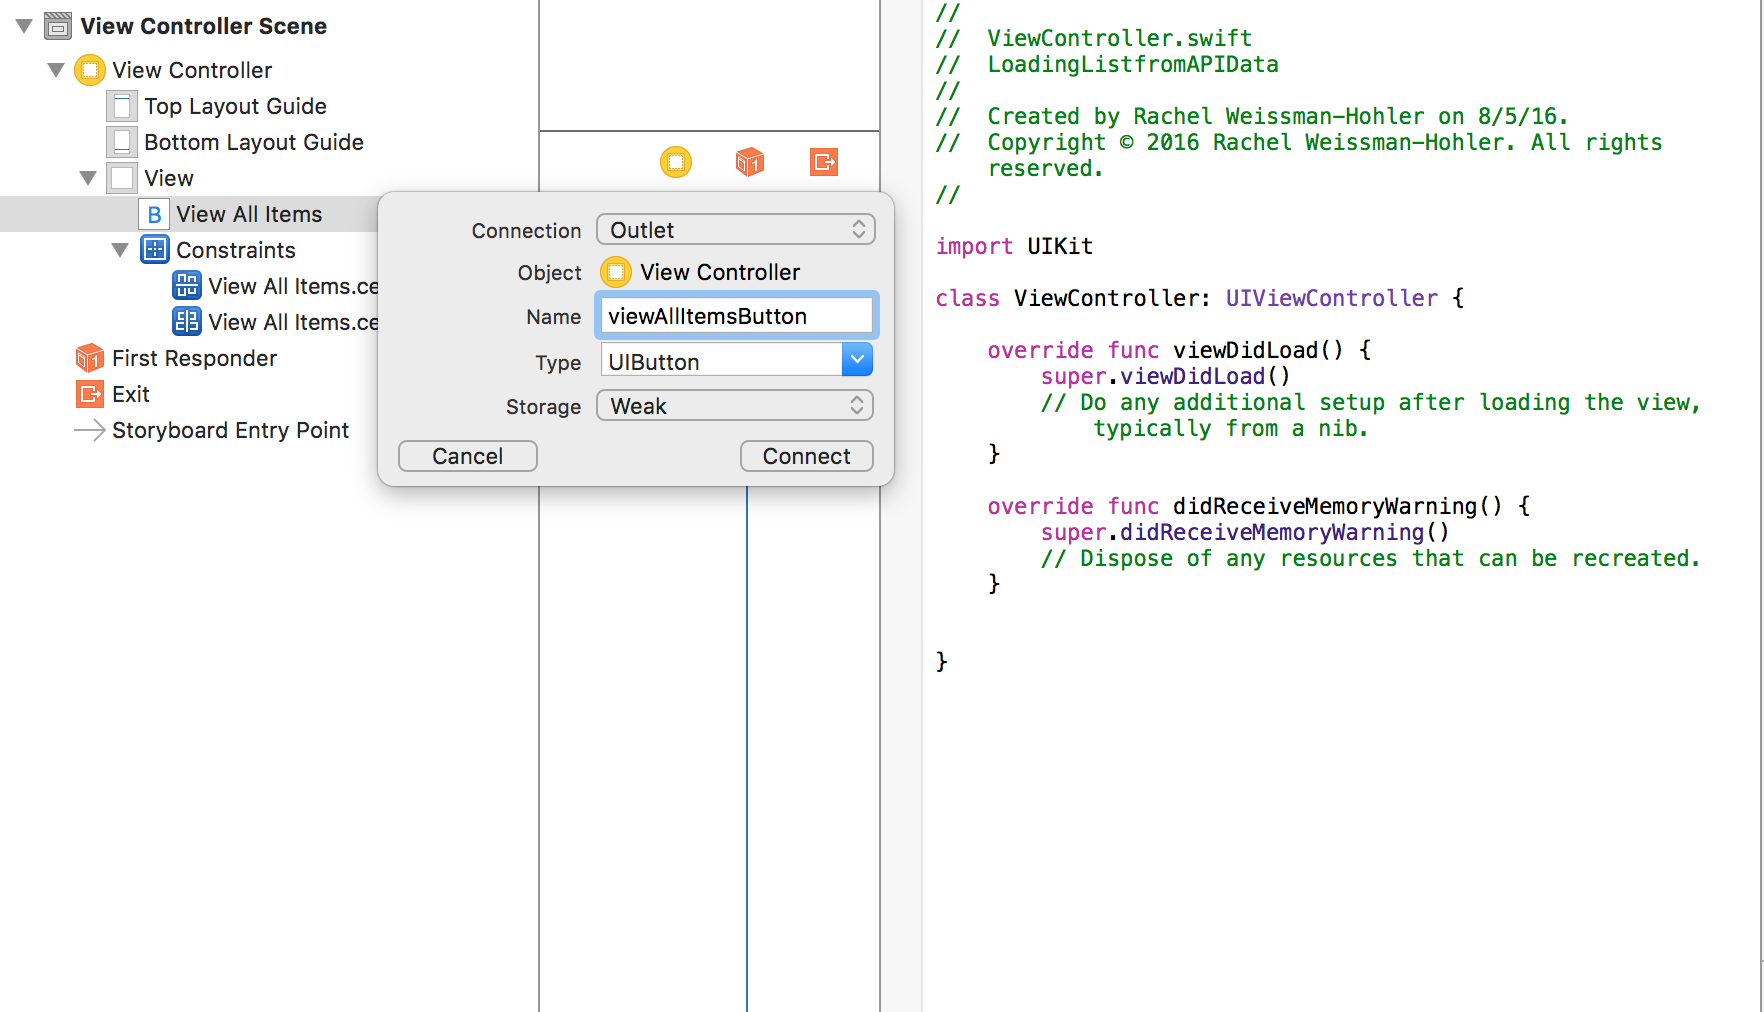
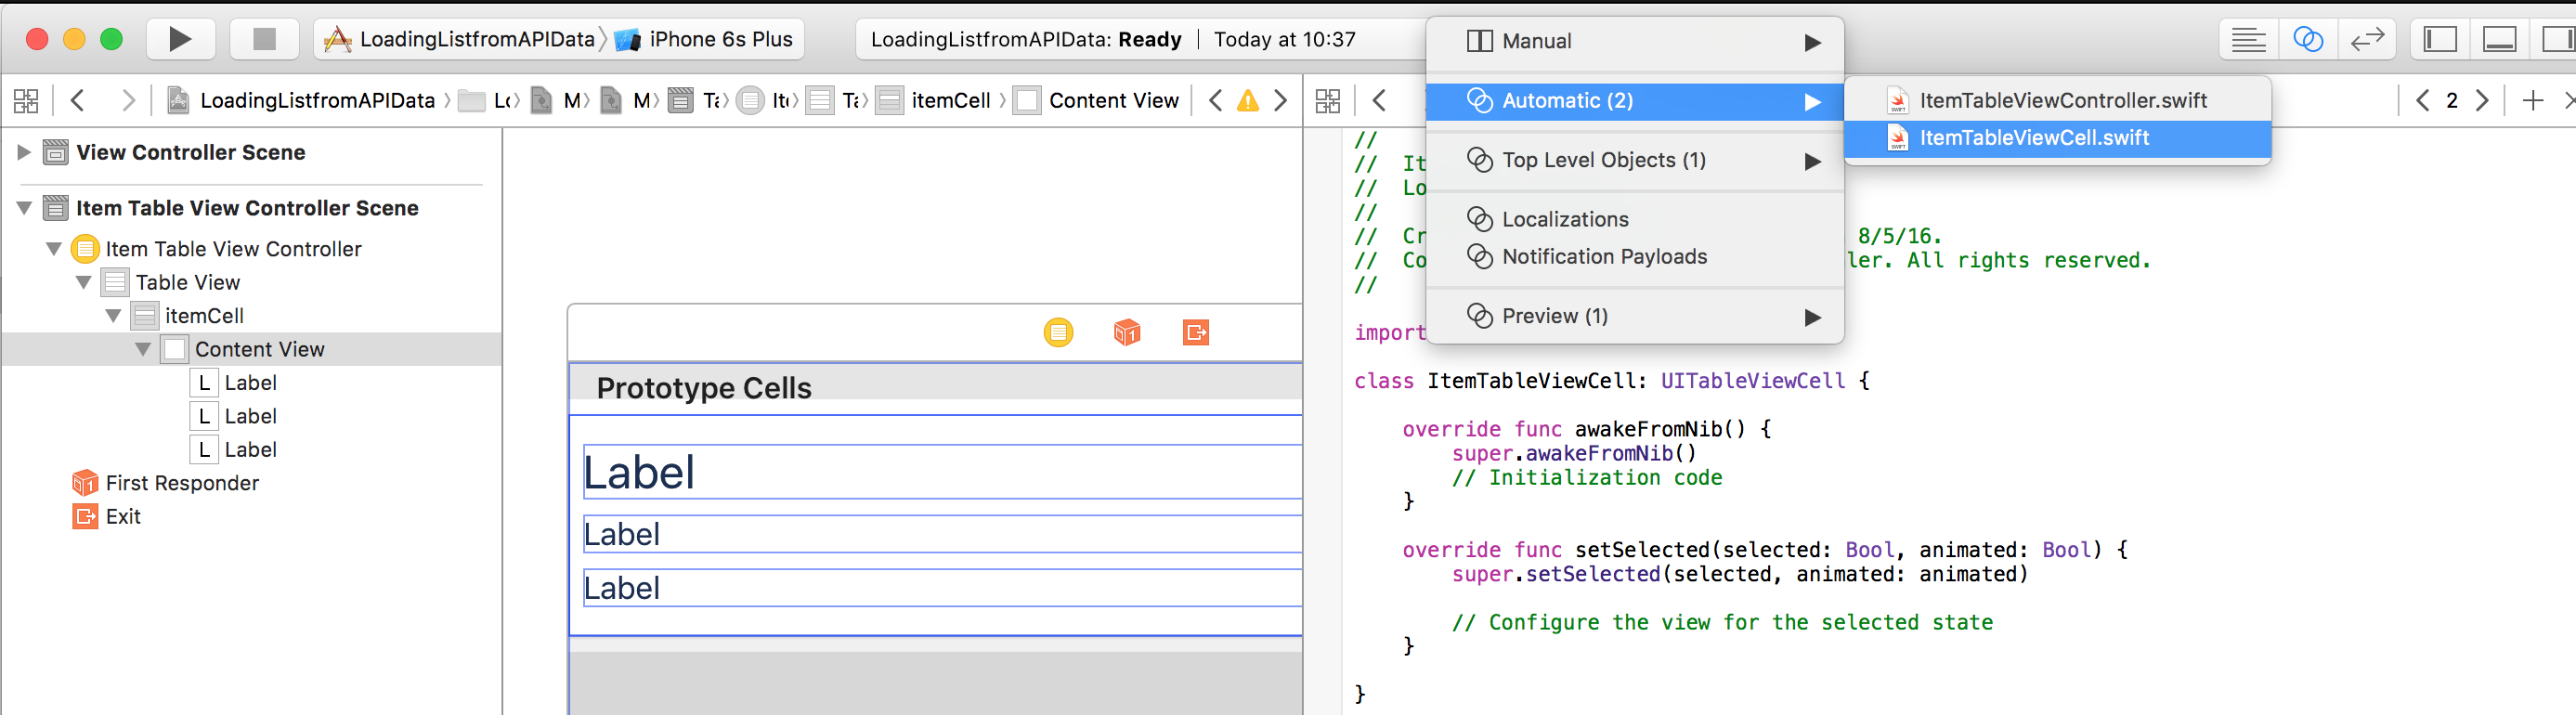
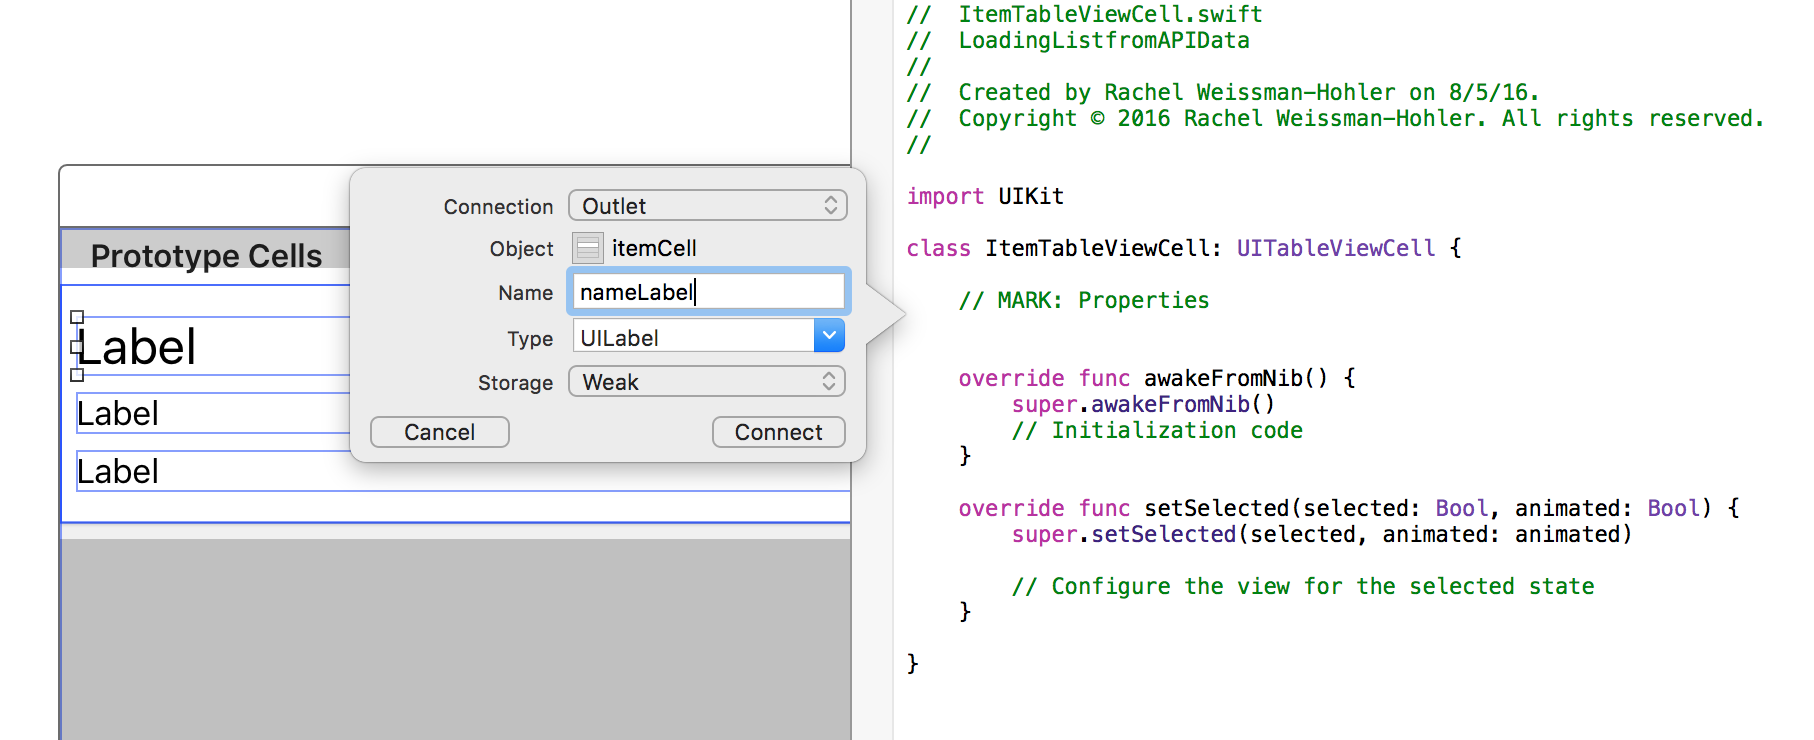
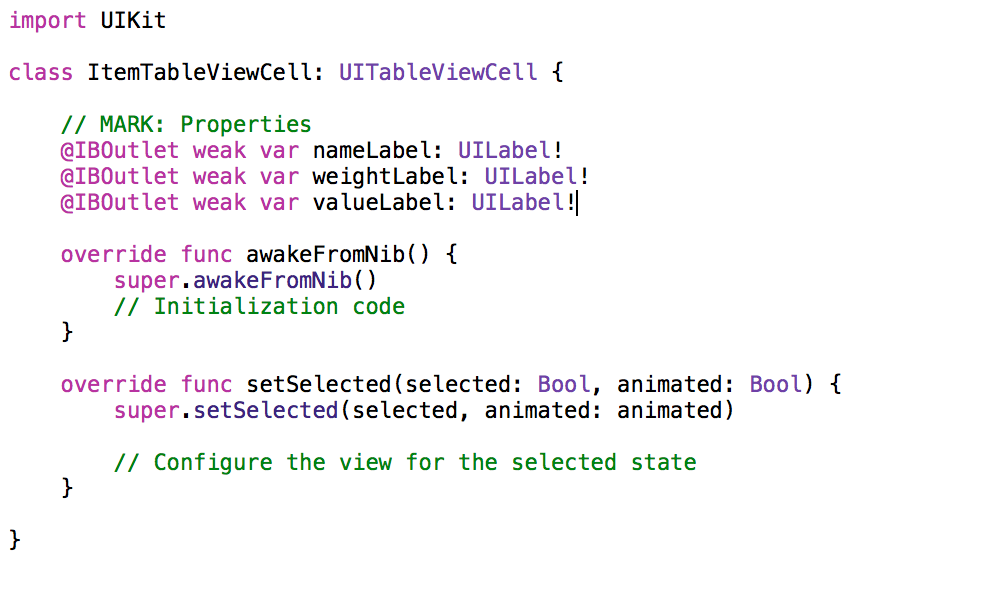
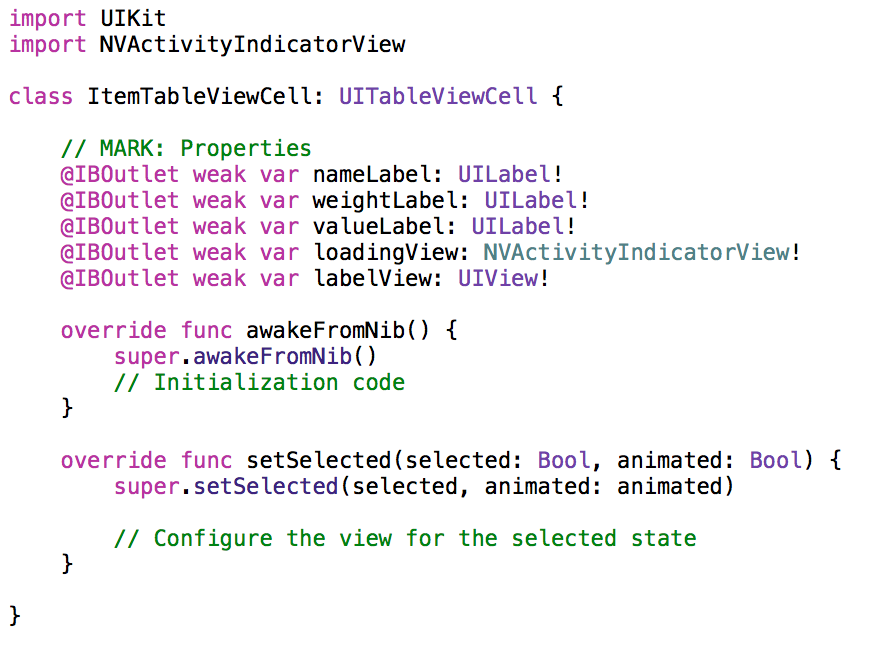
Now we need to add outlets for the new views so we can show and hide them in the view controller. Switch to Assistant editor and select ItemTableView.swift. We need add the following below the import UIKit
statement: import NVActivityIndicatorView
. Next, below the outlets for the labels, control-click and drag from the square view (that will hold the loading animation) to the code. Name the outlet something suitable (I went with "loadingView"), make sure the Type field is set to "NVActivityIndicatorView", and click connect. To add the second outlet, control-click and drag from the view that contains the labels to just below the outlet we just created. Name the new outlet somethin suitable (I chose "labelView"), and click connect.
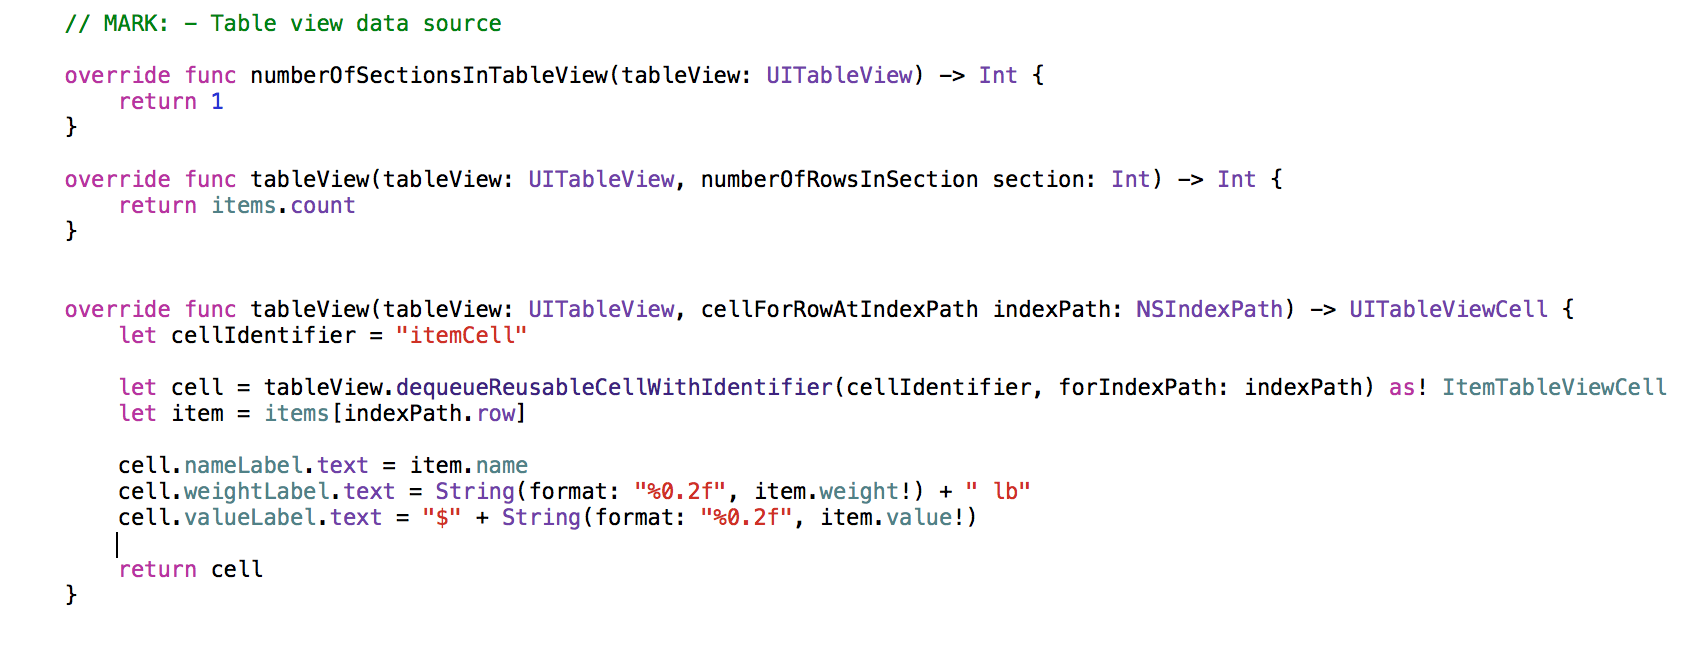
As we now have the outlets to access our new views, it's time to add the logic that will switch between the two. Go back to the Standard editor and select ItemTableViewController.swift in the Project navigator. In override func tableView(tableView: UITableView, cellForRowAtIndexPath indexPath: NSIndexPath) -> UITableViewCell
, add the following before return cell
:
if item.id == "temp" {
cell.labelView.hidden = true
cell.loadingView.startAnimation()
} else {
cell.labelView.hidden = false
cell.loadingView.stopAnimation()
}
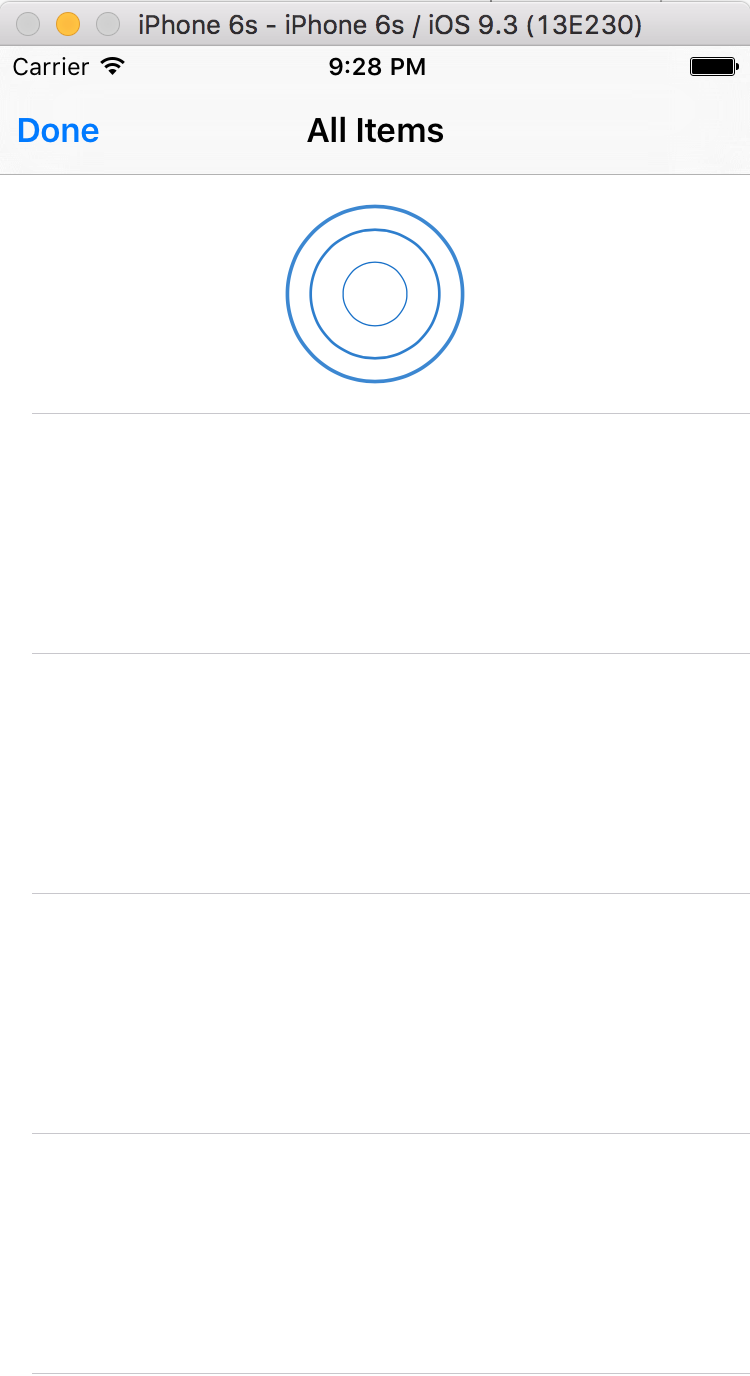
This will show the loading animation if the cell's id is "temp", and otherwise it will display the name, weight, and value of the item. You can now run your project and click on the "View All Items" button to see the loading animation.
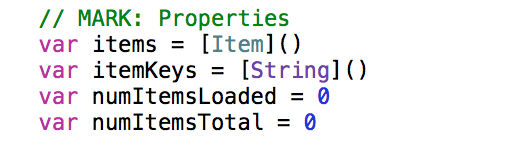
We're almost done! We just need to add in the second set of API calls to get the item details. Back in ItemTableViewController.swift, we need to add a variable that will keep track of how many items have actually been loaded and a variable that will track the number of items in total to load. Accordingly, add the following lines below the other properties:
var numItemsLoaded = 0
var numItemsTotal = 0
Below the large commented-out section, add the following function:
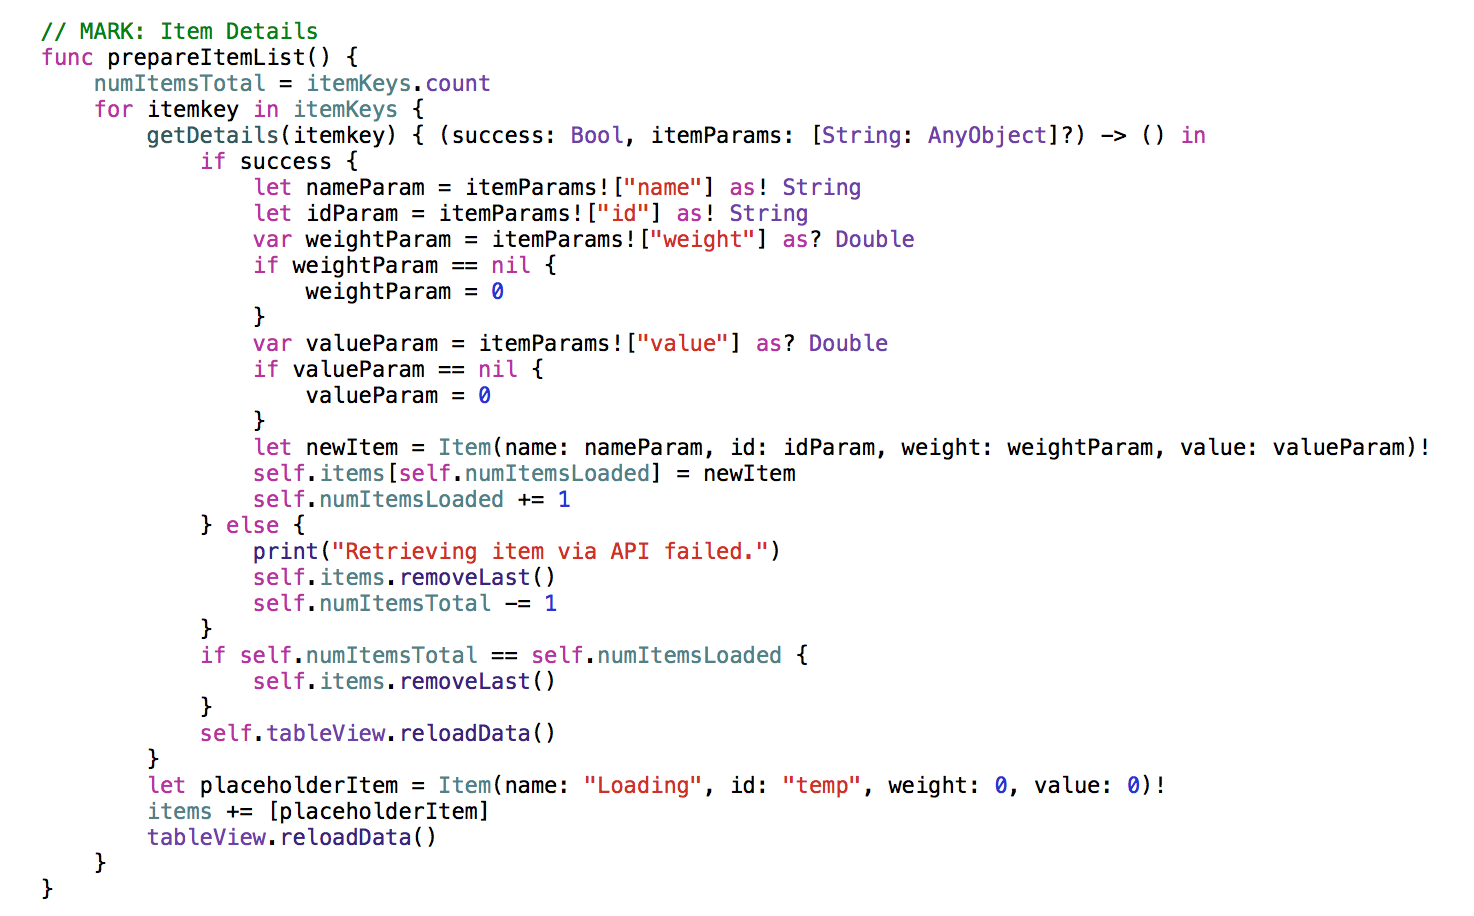
This function sets the initial value of the numItemsTotal equal to the number of keys retrieved in the first API call. It then loops through the keys and calls the function getDetails (which we'll write next) and, in doing so, registers a completion function. The completion function takes a dictionary containing the item parameters received from the API call and, if the call was successful, creates a new Item object using those values. It then adds that new Item to the items array in the place of a placeholder item (whose position is calculated based on the numItemsLoaded). The numItemsLoading is then incremented. If the API call failed, then a placeholder item is removed from the items array and the numItemsTotal is decremented. Finally, there is a check to see if all of the items to load have been loaded with real data (or removed if their API call failed), which when true removes the final placeholder item (which, in turn, means that the final loading animation goes away). The table view is then reloaded to reflect any changes to the rows. Outside the completion function, a placeholder item is added to the items array for each item key and the table view is reloaded.
Now that we've called getDetails, we should write it. Below prepareItemList, add the following function:
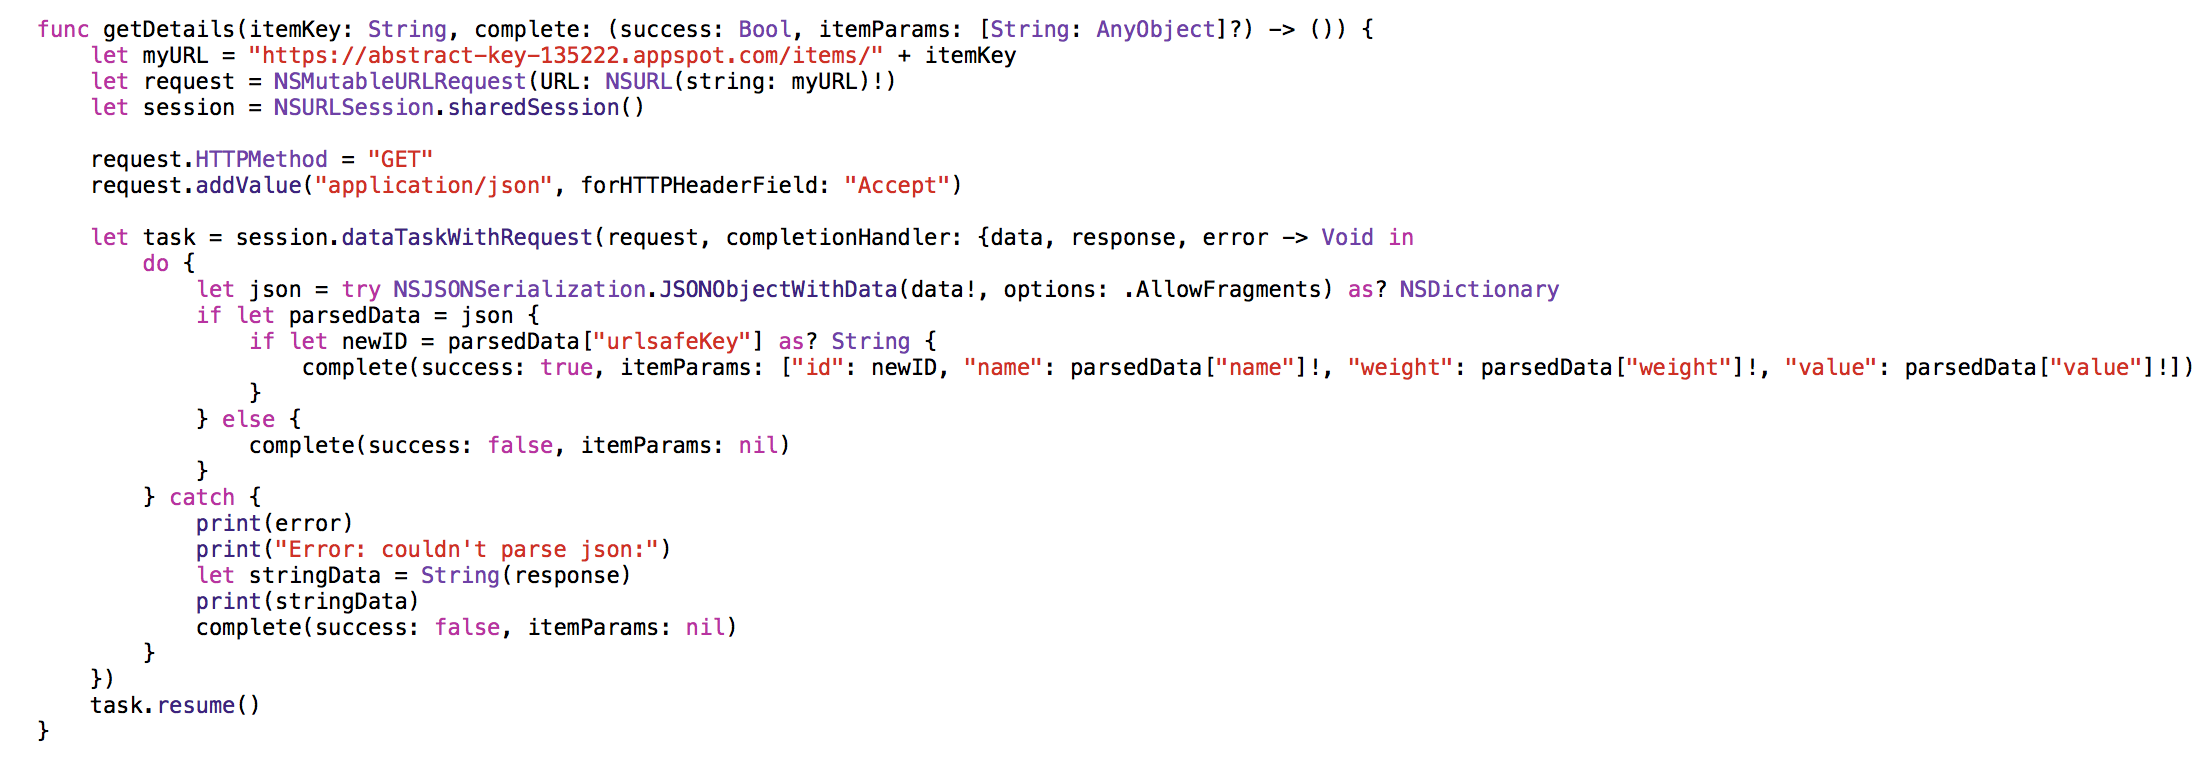
This is the function that makes the API call to get the details for an item. It is very similar to our first API calling function, except that, instead of storing item keys, it parses and stores the item parameters (so lond as the JSON object and the key can be parsed).
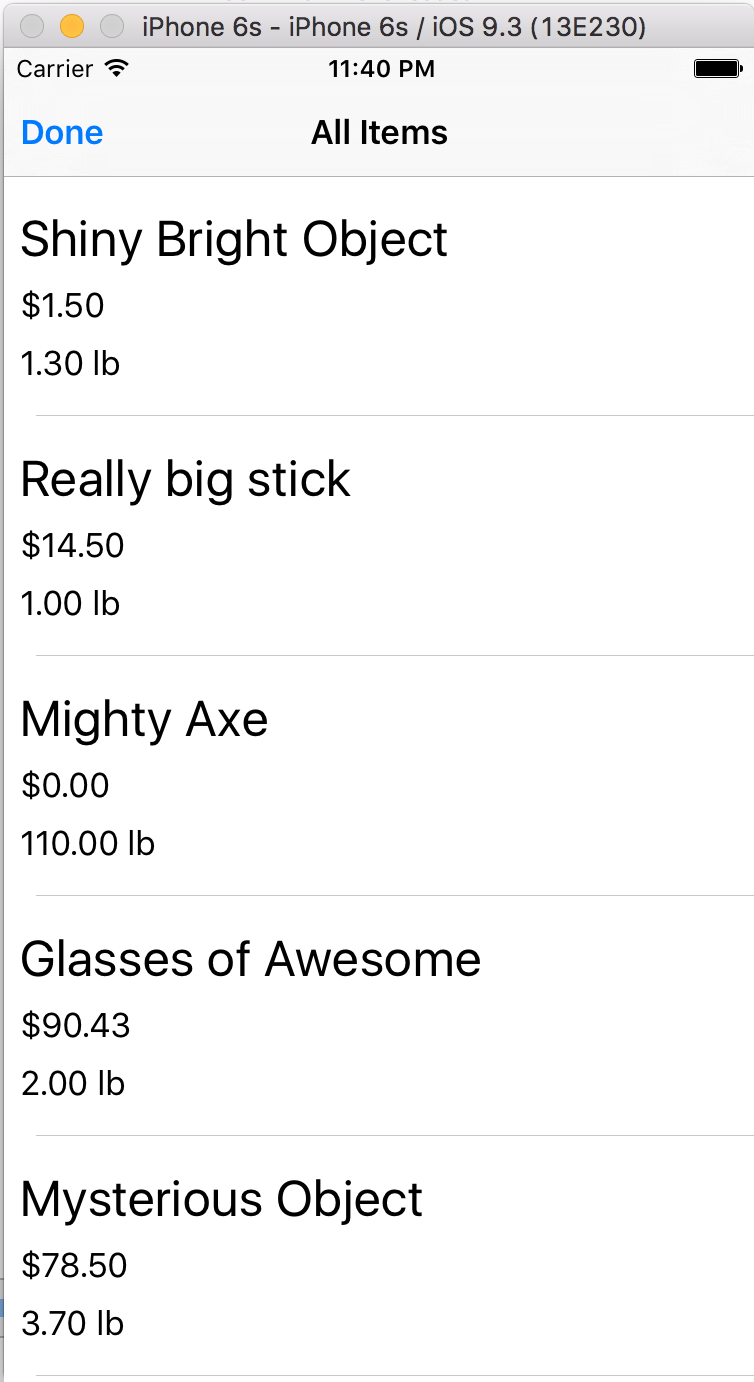
Finally, we need to actually call prepareItemlist. In the Project navigator, select ViewController.swift. In prepareForSegue, below the line destinationView.itemKeys = listOfKeys!
add the following: destinationView.prepareItemList()
. And we're done! You can now run the application and when you click "View All Items", you should briefly (depending on your internet connection) see a loading animation and then the list should populate from the top down with items.